Roasted Brussel Sprouts: Flavorful and Nutritious
Roasted Brussel sprouts transform from simple vegetables into caramelized flavor bombs when exposed to high heat, developing crispy exteriors while maintaining tender centers.
The cooking process naturally enhances their sweetness by caramelizing natural sugars, creating a nutty, smoky flavor profile that can convert even the most stubborn Brussel sprout skeptics.
Table of Contents
Key Takeaways
- The magic of roasted Brussel sprouts comes from the contrast between crispy, caramelized exteriors and tender centers, achieved only through high-heat cooking.
- Proper preparation—trimming stems, cutting larger sprouts in half, and thoroughly drying them—ensures even cooking and better caramelization.
- Avoid overcrowding the pan, as Brussel sprouts need space to roast rather than steam for optimal crispiness.
- Roasting at 400-425°F creates the perfect environment for caramelization while preventing burning.
- Brussels sprouts are highly nutritious with just 56 calories per cup. They provide significant amounts of fiber, vitamin K, vitamin C, and antioxidants that support immune and heart health.
What Makes These Brussel Sprouts Special
I’ve found that roasted Brussel sprouts stand out from other vegetable preparations because of their incredible texture and flavor transformation. The magic happens when high heat meets these little green gems, creating a dish that even former Brussel sprout skeptics have learned to love.
Perfect Texture and Flavor Profile
The contrast between the crispy exterior and tender centers makes roasted Brussels sprouts truly special. When cooked properly, the outer leaves become delightfully crunchy—almost chip-like—while the centers remain tender and flavorful. This textural contrast is something you simply can’t achieve with steaming or boiling.
Caramelization is the secret behind their appealing flavor. As Brussels sprouts roast, their natural sugars rise to the surface and brown, creating sweet, nutty notes that balance perfectly with their natural earthiness. Those beautifully browned edges are packed with complex flavors that bring depth to every bite. The slight char you get from roasting also adds a smoky element that pairs wonderfully with a variety of seasonings.
Preparation couldn’t be simpler, making these an accessible option for weeknight dinners. Unlike many side dishes that require constant attention, roasted Brussels sprouts need minimal hands-on time:
- Cut, season, and arrange on a baking sheet
- Pop them in the oven and set a timer
- Give them one quick toss halfway through cooking
- Serve hot from the oven
The convenience factor makes these Brussel sprouts a practical choice for busy cooks. You can prep them ahead of time and simply slide them into the oven when needed, similar to how I prepare honey roasted carrots for efficiency during busy weeknights.
From a nutritional standpoint, roasting Brussel sprouts preserves more nutrients than boiling and requires far less oil than frying. These cruciferous vegetables are packed with vitamins K and C, fiber, and antioxidants. Roasting enhances their bioavailability while keeping them lighter than their fried counterparts. The high-heat cooking method also helps reduce some of the compounds responsible for that infamous bitter taste that turns many people away from Brussels sprouts.
The versatility of roasted Brussels sprouts truly sets them apart. They can serve as a simple side dish with just salt, pepper, and olive oil, or they can be dressed up with balsamic glaze, honey, bacon, or parmesan for more complex flavor profiles. This adaptability makes them perfect for everything from casual family meals to holiday feasts.
I’ve found they pair beautifully with other roasted vegetables, creating complementary flavors and textures. When served alongside sweet potato dishes or cabbage recipes, they help create a colorful, nutritious plate.
The caramelized edges of roasted Brussel sprouts offer natural sweetness without added sugar. This natural caramelization process transforms their flavor profile completely, making them taste less like the boiled Brussels sprouts many remember from childhood and more like a gourmet vegetable dish you’d find at upscale restaurants.
What’s particularly appealing about roasting Brussel sprouts is how the method enhances their natural flavors while minimizing their sometimes overwhelming cabbage-like qualities. The high heat cooking process reduces compounds that can make Brussels sprouts bitter, while concentrating their natural sugars. Similar to how grilled corn transforms through caramelization, Brussel sprouts develop a remarkable sweetness when roasted properly.
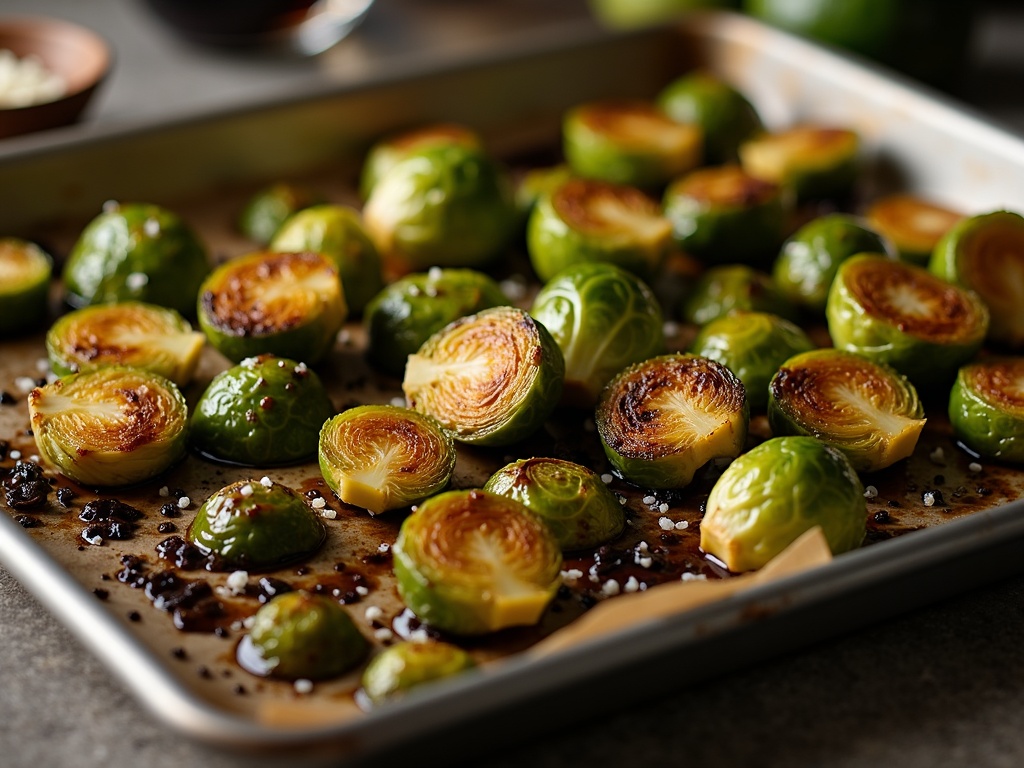
Everything You Need to Get Started
Fresh brussel sprouts are the foundation of this delicious dish. I recommend selecting bright green, firm sprouts with tightly packed leaves. Smaller sprouts tend to be sweeter, while larger ones can have a more cabbage-like flavor. When shopping, look for sprouts that feel heavy for their size and avoid any with yellowing leaves or soft spots.
Olive oil is essential for achieving that perfect crispy exterior. A good quality extra virgin olive oil adds flavor while helping the brussel sprouts caramelize in the oven. You’ll need about 2-3 tablespoons for a pound of sprouts, which is enough to coat them generously without making them soggy. Similar to honey roasted carrots, the oil helps create that irresistible golden exterior.
Salt and black pepper are simple but crucial seasonings. I prefer kosher salt for its clean flavor and ability to stick to the vegetables better than table salt. Freshly ground black pepper provides a subtle heat that complements the natural sweetness that develops during roasting. Don’t be shy with these seasonings – brussels sprouts can handle a generous amount.
Optional Flavor Enhancers
Adding garlic takes your roasted brussel sprouts to another level. You can use fresh minced garlic (2-3 cloves per pound of sprouts) or garlic powder (about 1/2 teaspoon) for convenience. The garlic becomes wonderfully aromatic and adds depth to the dish, similar to how it enhances fried cabbage recipes with its pungent notes.
Balsamic vinegar creates a sweet-tart glaze that makes these vegetables irresistible. Just a tablespoon or two drizzled over the sprouts before roasting caramelizes in the oven, creating a sophisticated flavor profile. For best results, use a good quality balsamic vinegar that’s been aged at least a few years. This addition pairs particularly well with brussel sprouts, just as it does with ratatouille recipes where it brings out the natural sweetness of vegetables.
Parmesan cheese adds a salty, umami finish that converts even the most stubborn brussel sprouts skeptics. Freshly grated is best – about 1/4 cup per pound of sprouts is perfect for sprinkling over the vegetables in the last few minutes of roasting. The cheese will melt and form a crispy, golden crust. This technique works beautifully for brussel sprouts just as it does for green bean salads when you want to add a savory element.
Beyond these basics, I’ve found that brussel sprouts are surprisingly versatile. They pair wonderfully with sweet elements like maple syrup or honey, creating a balance similar to sweet potato salad. For a hint of smokiness, adding a pinch of smoked paprika before roasting gives depth and complexity.
For texture contrast, consider adding some nuts like pine nuts, walnuts, or pecans in the last 5 minutes of roasting. They’ll toast alongside the sprouts and provide a pleasant crunch. If you enjoy a bit of heat, red pepper flakes work beautifully, adding a spicy kick that contrasts with the natural sweetness of the roasted vegetables.
Equipment needs are minimal – just a rimmed baking sheet is essential for proper roasting. Parchment paper makes cleanup easier and helps prevent sticking, though it’s not strictly necessary. A bowl for tossing the sprouts with oil and seasonings is helpful, along with a spatula for stirring them halfway through cooking.
The beauty of roasted brussel sprouts is their adaptability – much like grilled corn on the cob, they can be customized with countless flavor combinations while maintaining a simple cooking method. With these basic ingredients on hand, you’re ready to transform this once-maligned vegetable into a crave-worthy side dish.
Preparing Your Brussel Sprouts
Before roasting Brussel sprouts to crispy perfection, proper preparation makes all the difference. I’ve found that taking a few extra minutes during prep ensures these little green gems cook evenly and develop that irresistible caramelization.
Essential Prep Steps
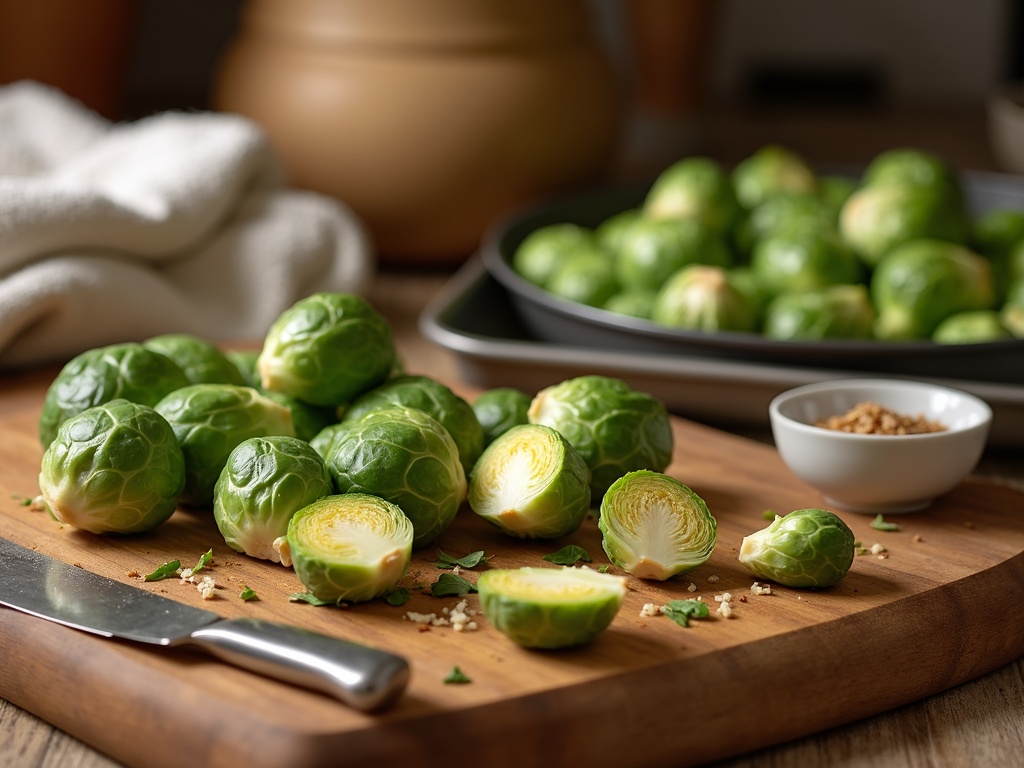
First, I always trim the stems of each Brussel sprout. Using a sharp paring knife, I cut away the tough, woody stem end, removing just enough to refresh the cut surface without sacrificing too much of the vegetable. This step helps the sprouts cook more evenly while removing any dried-out portions.
Next, I remove any loose or discolored outer leaves. These tend to burn easily during roasting and can impart a bitter taste to your finished dish. The outer leaves naturally peel away after trimming the stems, but I check each sprout and pull off any leaves that look yellowed or damaged.
For consistent cooking, I cut larger Brussels sprouts in half lengthwise. This allows the heat to penetrate more efficiently and creates more surface area for that delicious caramelization to occur. As a general rule, I leave sprouts under an inch in diameter whole, while anything larger gets halved. For exceptionally large sprouts, quartering them ensures they’ll cook through without burning.
Washing is an essential step that removes any dirt or residue. I place the trimmed sprouts in a colander and rinse them thoroughly under cool running water. After washing, thorough drying is absolutely crucial for achieving crispy roasted Brussels sprouts. I use either a salad spinner or pat them dry with clean kitchen towels. Any excess moisture will create steam in the oven, resulting in soggy rather than crispy sprouts.
The final preparatory step involves tossing the sprouts with oil and seasonings. I place the dried Brussel sprouts in a large mixing bowl and add olive oil – about 1–2 tablespoons per pound of sprouts is sufficient to coat them without making them greasy. To distribute the oil evenly, I use my hands to toss and turn the sprouts until each piece has a light, consistent coating.
For basic seasoning, these ingredients work wonderfully:
- Kosher salt and freshly ground black pepper
- Minced garlic or garlic powder
- A pinch of red pepper flakes for subtle heat
- A squeeze of fresh lemon juice after roasting
For additional flavor variations, I sometimes add complementary ingredients like finely grated parmesan cheese, balsamic vinegar, or a drizzle of honey for sweetness similar to honey-roasted vegetables.
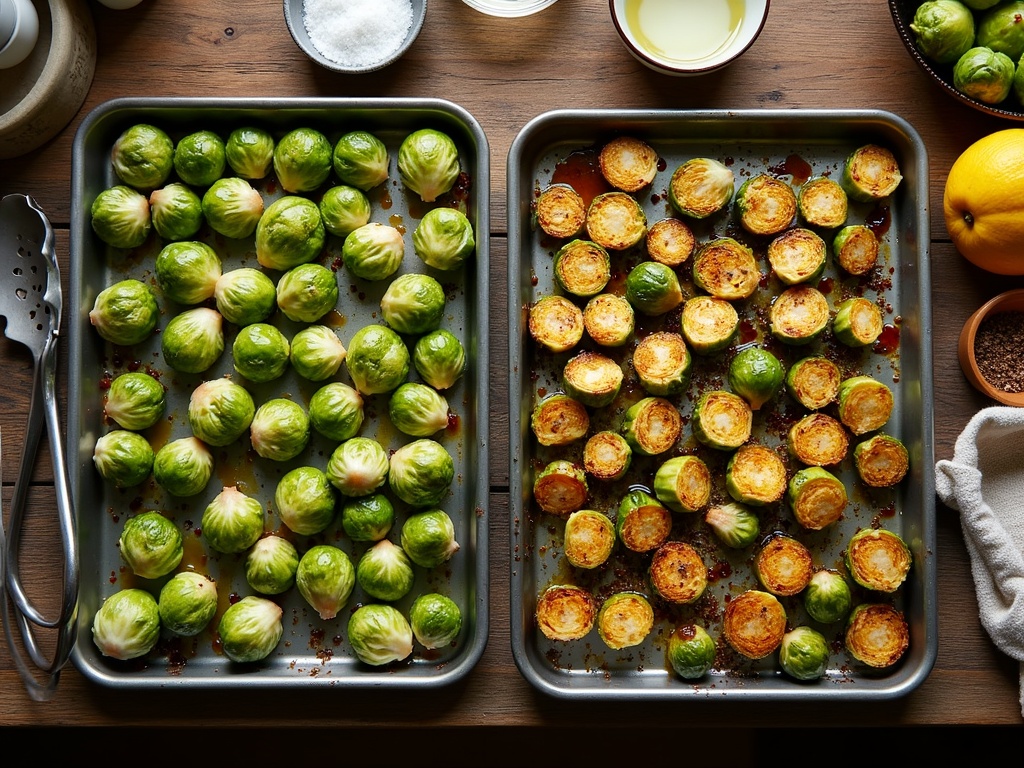
After coating with oil and seasonings, I arrange the Brussels sprouts in a single layer on a baking sheet, making sure they aren’t crowded. Overcrowding causes the sprouts to steam rather than roast, preventing proper browning. If needed, I use two baking sheets rather than piling the sprouts too closely together.
For those who enjoy the flavor combination of Brussels sprouts with other vegetables, consider adding them to a medley with corn kernels or trying them alongside a sweet potato dish for complementary flavors.
Brussel sprouts are actually related to cabbage, and if you enjoy them, you might also like trying a fried cabbage recipe using similar preparation techniques.
The care taken during preparation directly impacts the final taste and texture of your roasted Brussel sprouts. When properly prepared, these often-maligned vegetables transform into a crave-worthy side dish that pairs beautifully with almost any main course.
Steps to Perfectly Roasted Sprouts
Roasting Brussel sprouts transforms them from bitter, unloved vegetables into crispy, caramelized delights that even the pickiest eaters can’t resist. The process is straightforward, but a few key techniques make all the difference between soggy disappointments and perfectly roasted gems.
The Perfect Roasting Method
First, I always preheat my oven to 400°F. This temperature hits the sweet spot — hot enough to create that desirable caramelization but not so hot that the sprouts burn before cooking through. While the oven heats up, I prepare my Brussel sprouts by trimming the woody ends and slicing them in half lengthwise. This cutting exposes more surface area, which means more crispy edges.
The arrangement on the baking sheet matters significantly. I place each sprout cut-side down directly on the sheet. This position allows the flat surfaces to make full contact with the hot pan, creating that gorgeous golden-brown sear that’s packed with flavor. It’s similar to how I position honey roasted carrots for that perfect caramelization.
Spacing is another crucial factor often overlooked. I make sure to arrange the sprouts with enough room between each piece — overcrowding leads to steaming rather than roasting. If you’ve ever made ratatouille or other roasted vegetables, you’ll know this principle applies universally.
Once in the oven, the sprouts need about 20-25 minutes to reach perfection. The exact timing depends on their size and your oven’s accuracy. Around the halfway mark (10–12 minutes in), I give the pan a good shake or use a spatula to stir the sprouts. This ensures even cooking and prevents any potential burning. Similar attention is needed when preparing grilled corn on the cob — timing and turning make all the difference.
The visual cues for doneness include:
- Deeply browned edges
- Tender interiors when pierced with a fork
- Slightly crispy outer leaves
These crispy bits are treasure — packed with concentrated flavor and satisfying texture, much like the crispy edges you’d find on fried cabbage.
For added interest, I sometimes toss my roasted Brussel sprouts with complementary ingredients right after roasting. A splash of balsamic vinegar, a sprinkle of Parmesan cheese, or some lemon zest can elevate them further. They make an excellent side dish paired with meats or can be cooled and added to a hearty sweet potato salad or green bean salad for interesting textural contrast.
The beauty of mastering this simple technique is that it works with countless variations. Once you’ve got the basic method down, you can play with different seasonings, glazes, and combinations. Brussels sprouts roasted this way move from obligatory vegetable to dinner highlight — crispy, nutty, and completely transformed from their raw state.
Common Mistakes to Avoid
When roasting Brussels sprouts, even small errors can make the difference between crispy, caramelized perfection and soggy, bitter disappointment. I’ve made plenty of mistakes while perfecting my technique, and I’m sharing these lessons so you can avoid the same pitfalls.
Kitchen Blunders That Ruin Brussels Sprouts
Overcrowding the pan is perhaps the most frequent error I see home cooks make. When Brussels sprouts are packed too tightly, they steam instead of roast. This leads to soft, mushy vegetables instead of the crispy exterior we’re aiming for. I always make sure to arrange them in a single layer with some space between each sprout. If I’m preparing a large batch, I’ll use two baking sheets rather than cramming everything onto one pan.
Using wet Brussels sprouts is another common misstep. Water creates steam in the oven, which prevents that beautiful caramelization from happening. After washing your sprouts, take the time to thoroughly pat them dry with paper towels or a clean kitchen cloth. For extra insurance against moisture, I often wash them well in advance and let them air dry before roasting.
Not using enough oil often results in dry, unevenly cooked vegetables. Brussels sprouts need a proper coating of oil to help them roast evenly and develop that golden exterior. I typically use about 1–2 tablespoons of olive oil per pound of Brussels sprouts, making sure each one gets a light, even coating. The oil acts as a heat conductor and helps the exterior crisp up beautifully – similar to how honey roasted carrots develop their caramelized exterior.
Setting the wrong oven temperature can completely undermine your efforts. Too low, and your sprouts will cook through but never develop that desirable crisp exterior. Too high, and the outsides might burn before the centers become tender. I’ve found that 400–425°F (205–220°C) is the sweet spot for roasting Brussels sprouts. This high heat quickly caramelizes the natural sugars in the vegetables, similar to what happens with grilled corn on the cob.
Forgetting to season is a mistake that leaves Brussels sprouts tasting bland or highlighting their natural bitterness. Salt and pepper are essential, but don’t stop there. I like to add garlic powder or fresh minced garlic for depth. A sprinkle of red pepper flakes adds a pleasant heat, while a drizzle of balsamic vinegar or honey before serving balances any remaining bitterness with acidity or sweetness. These flavor-boosting techniques can transform Brussels sprouts the way they enhance fried cabbage recipes with complementary flavors.
The timing of your seasonings matters too. While salt, pepper, and garlic can go on before roasting, delicate herbs and acidic ingredients like lemon juice or balsamic vinegar are best added after cooking to preserve their bright flavors.
Not tossing the Brussels sprouts halfway through roasting can result in uneven cooking. I set a timer to remind myself to give them a good shake or stir at the halfway mark. This ensures all sides get evenly browned, similar to how you might rotate a pan of sweet potatoes for even roasting.
Cutting Brussels sprouts inconsistently leads to uneven cooking. Larger pieces will remain underdone while smaller ones burn. I try to halve or quarter them to roughly the same size, ensuring they’ll finish cooking at the same time, much like when preparing vegetables for a ratatouille recipe or green bean salad.
By avoiding these common mistakes, you’ll be well on your way to creating perfectly roasted Brussels sprouts that might just convert even the most stubborn sprout skeptics at your table.
Pro Tips for the Best Results
Getting crispy, flavorful roasted Brussels sprouts doesn’t have to be complicated. I’ve found that a few simple tricks can elevate this humble vegetable from good to absolutely irresistible. These pro tips will help you achieve restaurant-quality results every time.
Preparation Makes Perfect
Choosing the right sprouts is your first step to success. I always select Brussels sprouts of similar size to ensure even cooking. When sprouts vary dramatically in size, smaller ones burn while larger ones remain undercooked. For uniform results, sort your sprouts before roasting and cook similar sizes together.
Parchment paper is a game-changer for roasting vegetables. I line my baking sheets with it for two important reasons: it prevents Brussels sprouts from sticking to the pan and makes cleanup a breeze. Nothing’s worse than scrubbing burnt bits off a sheet pan when you could be enjoying your meal instead. The parchment also helps create that perfect caramelization without burning.
When it comes to seasonings, timing matters more than you might think. While it’s tempting to season Brussels sprouts before roasting, I’ve discovered that adding salt and pepper after roasting actually preserves the crunchier texture. Salt draws out moisture, so applying it afterward keeps the outer leaves crisp while ensuring proper seasoning. For extra flavor, try finishing with a light sprinkle of flaky sea salt like I do with many roasted vegetables.
Finishing Touches That Make a Difference
The final minutes of roasting provide a perfect opportunity to add dimension to your Brussels sprouts. I add aromatics like minced garlic or fresh herbs during the last 5 minutes of cooking time. This prevents burning while still releasing those amazing aromas. For a flavor boost, try tossing in some lemon zest or drizzling with honey in these final minutes.
Timing extends beyond the oven too. Brussels sprouts are at their peak when served immediately after roasting. I transfer them directly to a serving dish rather than letting them cool on the baking sheet, which can cause unwanted steaming and soften that perfect crispy exterior. The contrast between the crisp outer leaves and tender interior is what makes properly cooked cruciferous vegetables so satisfying.
For an extra flavor dimension, consider these finishing touches:
- A splash of balsamic vinegar or lemon juice for brightness
- A sprinkle of freshly grated Parmesan cheese
- Toasted nuts like pine nuts or walnuts for texture
- Crispy bacon bits for a savory punch
- A drizzle of chili oil for heat lovers
The versatility of Brussel sprouts means they pair beautifully with a variety of proteins and other sides. I often serve them alongside seasonal vegetables like corn in summer or hearty ratatouille for a complete vegetable medley.
For a complete meal that showcases Brussel sprouts, try serving them with a protein of your choice and a complementary fresh green salad for contrast in temperature and texture. The combination of hot, crispy sprouts with cool, crisp greens creates a perfect balance on your plate.
Remember that Brussel sprouts continue cooking slightly after removal from the oven, so I always take them out when they’re just shy of my desired doneness. This ensures they’re perfectly cooked when they reach the table rather than overdone and mushy.
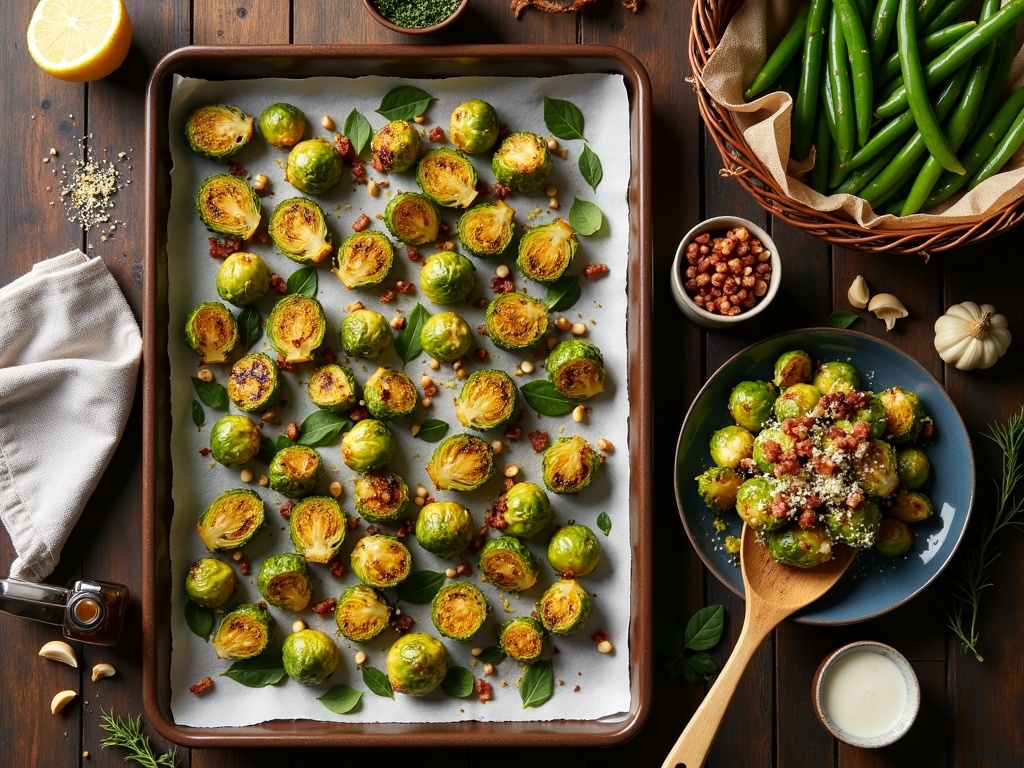
Flavor Variations to Try
I’ve discovered that roasted Brussels sprouts serve as an excellent canvas for various flavor combinations. Their slightly bitter, nutty profile pairs wonderfully with both sweet and savory ingredients. Over time, I’ve experimented with numerous glazes and seasonings that transform these humble vegetables into show-stopping side dishes.
Sweet and Spicy Combinations
Honey and sriracha glaze creates a perfect balance of sweet heat that caramelizes beautifully in the oven. I simply mix two tablespoons of honey with one tablespoon of sriracha sauce and drizzle it over my Brussels sprouts during the last 10 minutes of roasting. This combination adds a sticky, spicy-sweet coating that even converts Brussels sprout skeptics. For a similar flavor profile with an earthy twist, try honey-glazed vegetables like carrots alongside your sprouts.
Bacon and maple syrup bring together two classic flavors that complement the natural bitterness of Brussels sprouts. I crisp up chopped bacon in a pan first, then toss the sprouts with the rendered fat, roast until nearly done, and finish with a light drizzle of real maple syrup. The combination of smoky bacon and sweet maple creates an irresistible flavor contrast that pairs beautifully with crispy cabbage dishes for a hearty winter meal.
Balsamic reduction adds sophisticated sweetness that intensifies as it cooks. After roasting the sprouts until they’re nearly done, I drizzle them with quality balsamic vinegar and return them to the oven for 5–7 minutes. The vinegar reduces to a glossy glaze that adds tangy depth without overwhelming the vegetable’s natural flavor. This approach works wonderfully with other vegetables too, like in a ratatouille recipe where acidic notes balance richer ingredients.
Bright and tangy lemon garlic Brussels sprouts provide a lighter option that’s no less flavorful. I mince 3–4 garlic cloves and zest one lemon, tossing both with olive oil-coated sprouts before roasting. A squeeze of fresh lemon juice just before serving brightens the entire dish. This combination reminds me of Mediterranean flavors found in a fresh green bean salad – simple but incredibly effective.
Asian-inspired sesame Brussels sprouts introduce umami notes that transform the vegetable entirely. I whisk together a tablespoon each of soy sauce, honey, and sesame oil, then toss with roasted sprouts and sprinkle with toasted sesame seeds. Sometimes I’ll add a splash of rice vinegar for acidity. The nutty sesame complements the natural flavors of Brussels sprouts while the soy sauce adds depth. This approach works beautifully alongside grilled vegetables for an international-themed dinner.
For a more unique twist, I sometimes create a Southwest-inspired variation with cumin, chili powder, and lime – similar to how I’d season ingredients in a vibrant sweet potato dish. The key to successful Brussels sprouts lies in finding flavor combinations that balance their natural bitterness with complementary elements.
Each of these variations follows the same basic principle:
- Roast your Brussels sprouts until they’re nearly done.
- Add your chosen flavoring for the final minutes of cooking.
This prevents burning of sugars or delicate ingredients while still allowing enough time for the flavors to meld beautifully. The core technique stays consistent – high heat (around 400°F/205°C) and enough space between sprouts to allow proper browning – but these flavor variations keep this vegetable exciting meal after meal.
Storage and Reheating
After preparing a delicious batch of roasted Brussels sprouts, I often find myself with leftovers that I want to enjoy later. Proper storage is key to maintaining their flavor and texture for as long as possible.
Storing Roasted Brussels Sprouts
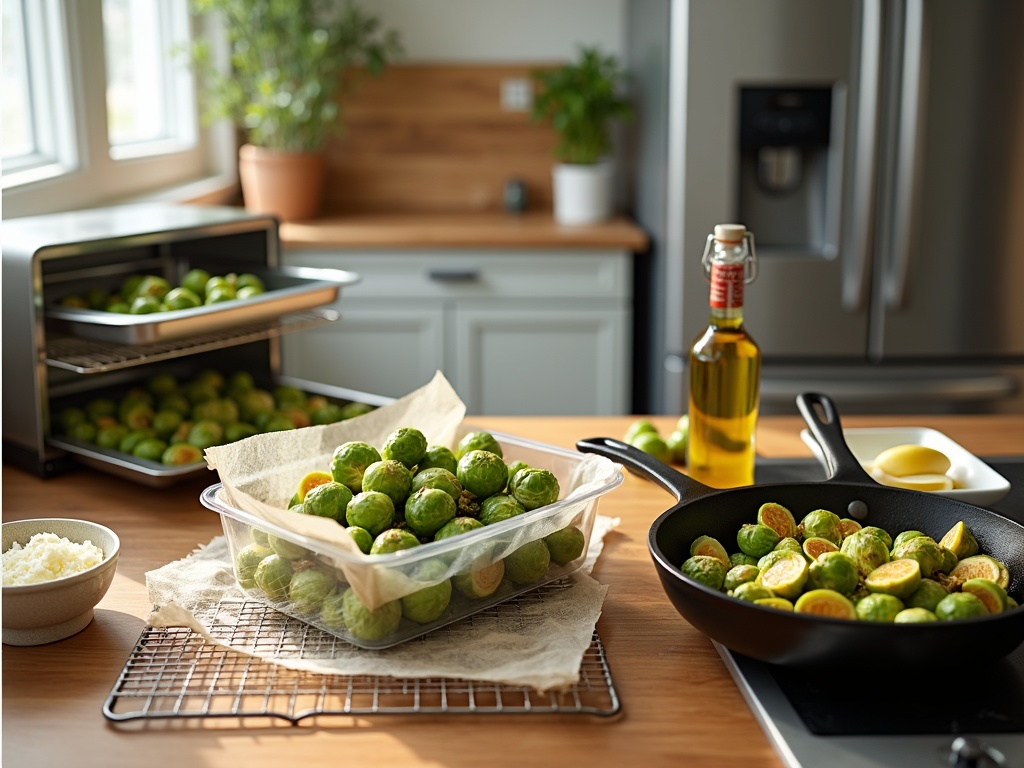
The first rule for storing roasted Brussels sprouts is to let them cool completely before putting them away. Once cooled, I place them in an airtight container lined with a paper towel to absorb any extra moisture. This simple step helps prevent the Brussels sprouts from becoming soggy.
For maximum freshness, refrigeration is essential. When stored properly in the refrigerator, roasted Brussels sprouts can last up to 4 days. I’ve found that glass containers work particularly well for vegetable storage as they don’t absorb odors and help maintain the quality of the sprouts.
If you need longer-term storage options for your Brussels sprouts, freezing is possible, but I should warn you about potential texture changes. After freezing and thawing, the sprouts won’t have the same crispy exterior that makes roasted vegetables so appealing. If you decide to freeze them anyway, place them in a freezer-safe container and use within 2-3 months.
Reheating for Optimal Flavor and Texture
When it comes time to enjoy your stored Brussels sprouts, the reheating method matters significantly. The oven is by far the best way to reheat roasted Brussels sprouts if you want to preserve their texture and flavor. I preheat my oven to 350°F, spread the sprouts on a baking sheet, and heat for about 5-7 minutes. This method helps restore some of the crispiness that may have been lost during storage.
For quicker results, a toaster oven works wonderfully and uses less energy than a full-sized oven. This approach is perfect when reheating a smaller portion of your favorite vegetable side dish.
While the microwave offers convenience, I strongly advise against using it for reheating roasted Brussels sprouts. Microwaving will leave them soggy and can give them an unpleasant texture that’s far from the crispy, caramelized quality you originally achieved. If you’re in a real hurry, it’s better to eat them cold than to microwave them.
A skillet on the stovetop can be a good alternative when the oven isn’t practical. Simply heat a small amount of oil in a skillet over medium heat, add the Brussels sprouts, and warm them for 3–4 minutes, tossing occasionally. This method can help restore some crispness, similar to how you might reheat other cruciferous vegetables.
- Add a light drizzle of olive oil before reheating to help crisp them up
- Sprinkle with a pinch of salt after reheating to refresh the flavor
- If the sprouts seem dry, add a tiny splash of balsamic vinegar or lemon juice
- For extra flavor, toss with freshly grated Parmesan cheese after reheating
Some additional tips for reheating that can help maintain quality:
With these storage and reheating tips, you can enjoy your roasted Brussels sprouts for days after the initial preparation. The key is protecting them from moisture during storage and restoring their texture during reheating. While they’re undoubtedly best freshly roasted, properly stored and reheated Brussels sprouts can still make a tasty addition to any nutritious meal throughout the week.
Nutritional Benefits
Roasted Brussels sprouts pack a powerful nutritional punch while remaining deliciously satisfying. These small, cabbage-like vegetables transform when roasted, developing a caramelized exterior and tender interior that makes it easy to enjoy their impressive health benefits.
Essential Nutrients in Brussels Sprouts
Brussels sprouts are incredibly nutrient-dense while being remarkably low in calories. A single cup of Brussels sprouts contains just 56 calories, making them perfect for those watching their caloric intake. Despite this low calorie count, they’re surprisingly filling thanks to their high fiber content—approximately 4 grams per cup—which helps support digestive health and keeps you feeling satisfied.
I’ve found that these little powerhouses are particularly notable for their vitamin content. They’re packed with vitamin K, providing over 100% of your daily recommended intake in a single cup. This essential vitamin plays a key role in blood clotting and bone health. Brussels sprouts also deliver a significant dose of vitamin C—around 80% of daily needs per cup—supporting immune function and skin health.
Antioxidant Properties and Heart Health
The health benefits of these green gems extend beyond just vitamins. Brussels sprouts contain powerful antioxidants that help fight damaging free radicals in your body. They’re particularly rich in kaempferol, an antioxidant that has been linked to reducing inflammation and cancer growth.
Adding green vegetables like Brussels sprouts to your meals supports heart health too. They contain alpha-lipoic acid, an antioxidant that’s been shown to lower glucose levels and increase insulin sensitivity, which may reduce heart disease risk. Their fiber content also helps maintain healthy cholesterol levels.
The nutritional profile of Brussels sprouts makes them stand out among vegetables:
- High in vitamin K for bone health and proper blood clotting
- Rich source of vitamin C for immune support and collagen production
- Contains manganese for brain function and metabolism
- Provides potassium for heart and muscle function
- Contains folate which is important for cell division
When I’m looking for a nutrient-rich side dish, I often turn to cruciferous vegetables like Brussels sprouts that offer similar health benefits to cabbage but with a unique flavor profile. Their natural compounds have been associated with reduced inflammation and even cancer prevention, making them a smart addition to any health-conscious meal plan.
