Hot Cocoa Cookies
Hot cocoa cookies turn a favorite winter drink into a delicious treat that combines cocoa powder and hot chocolate mix with mini marshmallows for an authentic flavor. These cookies deliver the essence of hot chocolate in a chewy, portable form that’s perfect for winter gatherings or holiday cookie exchanges.
Find In This Article
Key Takeaways
- The recipe combines cocoa powder with hot chocolate mix to create an authentic hot chocolate flavor profile in cookie form.
- Mini marshmallows added during the final minutes of baking provide the signature gooey sweetness associated with hot cocoa.
- Chilling the dough for at least 30 minutes prevents excessive spreading and enhances flavor development.
- The cookies should be slightly underdone when removed from the oven to achieve the perfect soft, fudgy center.
- These versatile cookies can be customized with additions like chocolate chips, peppermint, or made into sandwich cookies with marshmallow cream filling.
Everything You Need To Make These Cookies
I’ve gathered all the essential ingredients you’ll need to create these delicious hot cocoa cookies. The combination of cocoa powder and hot chocolate mix gives these cookies that authentic hot chocolate flavor while mini marshmallows add the perfect finishing touch.
Basic Ingredients
For the dry ingredients, you’ll need:
- 2 1/4 cups of all-purpose flour – this forms the base of the cookie dough.
- 1/2 cup unsweetened cocoa powder – brings a deep chocolate flavor.
- 3/4 cup hot chocolate mix – adds sweetness and that classic cocoa taste found in your favorite hot cocoa recipe.
- 1 teaspoon of baking soda – helps the cookies rise properly.
Do not substitute the cocoa powder with more hot chocolate mix or vice versa, as they serve different purposes and bring out unique flavors in the cookies.
The wet ingredients are straightforward:
- 1 cup of softened butter (not melted) – ensure it’s at room temperature for easier mixing and the ideal cookie texture.
- 1 cup granulated sugar – sweetens and balances the cocoa’s richness.
- 2 large eggs – adds structure and moisture to the dough.
- 1 teaspoon of vanilla extract – enhances all the other flavors.
Together, these ingredients create a chocolatey and chewy cookie dough packed with nostalgic warmth, just like other delightful hot chocolate cookies you might have tried.
Topping and Finishing Touches
The magic truly happens with the toppings:
- Mini marshmallows – essential for that classic homemade hot chocolate look and gooey sweetness. Press them gently onto the cookies during the last few minutes of baking so they get slightly toasted.
- Extra hot chocolate mix – sprinkle a bit over the cookies after baking for visual flair and an extra punch of cozy flavor.
All these ingredients work together to create cookies that taste just like your favorite mug of hot chocolate in cookie form. The rich chocolatey base combined with the marshmallow topping perfectly captures the essence of a warm homemade hot cocoa on a chilly day. These treats are perfect for winter gatherings or holiday cookie exchanges.
Step-By-Step Baking Instructions
Creating perfect hot cocoa cookies isn’t complicated when you follow these simple instructions. I’ve broken down the process into manageable steps that’ll help you achieve that delicious chocolatey goodness with minimal fuss.
Preparing and Baking Your Cookies
First, I always preheat my oven to 350°F. This temperature creates the ideal environment for these cookies to rise properly while maintaining their soft, fudgy centers. While the oven heats up, I line my baking sheets with parchment paper to prevent sticking.
In a medium bowl, I mix all the dry ingredients together. This ensures even distribution of the cocoa powder and other dry components throughout the dough. A quick whisk does the job perfectly.
Next, I cream the butter and sugar until the mixture turns light and fluffy. This step is crucial as it creates air pockets that help the cookies achieve that perfect texture. I usually beat for about 2–3 minutes until the color lightens noticeably.
After that, I beat in the eggs and vanilla. The eggs should be added one at a time, making sure each one is fully incorporated before adding the next. This prevents the mixture from curdling and ensures a smooth batter.
The next step involves gradually adding the dry mixture to the wet ingredients. I do this in small batches, mixing on low speed. Adding everything at once can create a mess and lead to overmixing, which makes for tough hot chocolate cookies.
Once the dough comes together, I form it into 1-inch balls. Using a cookie scoop helps maintain uniform size, which means they’ll all bake evenly. If the dough feels too sticky, I chill it for about 30 minutes first.
I place these dough balls on my lined baking sheets, leaving about 2 inches between each one to allow for spreading. Overcrowding the pan can cause cookies to merge together while baking.
The cookies need to bake for 10–12 minutes. I look for slightly firm edges while the centers remain soft – they’ll continue to set as they cool. For those who enjoy making homemade hot chocolate during the holidays, these cookies make the perfect companion.
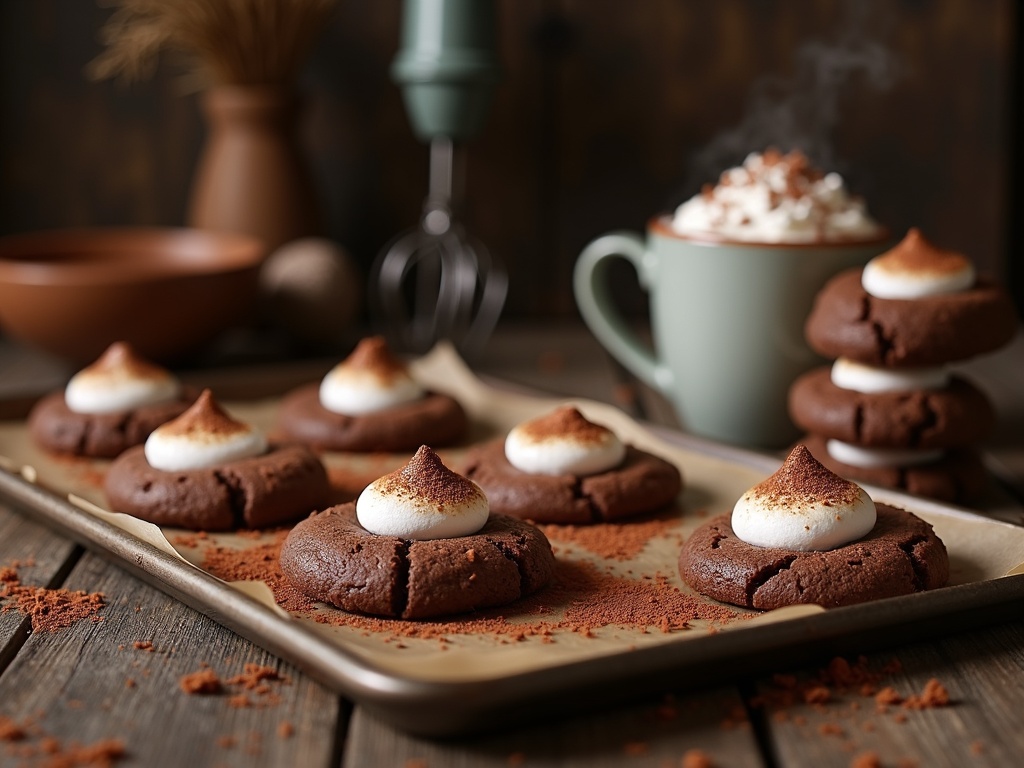
The magic happens right after taking them out of the oven. I immediately top each warm cookie with a marshmallow, pressing it gently into the center. The residual heat slightly melts the marshmallow, creating that characteristic hot cocoa recipe flavor we all love.
For the finishing touch, I dust the cookies with hot chocolate powder once they’ve cooled slightly. This gives them that authentic hot cocoa appearance and enhances their chocolate flavor.
These simple steps will lead you to cookies that taste just like a cup of homemade hot cocoa in solid form. The combination of rich chocolate cookie base, gooey marshmallow, and chocolate dust creates a treat that’s impossible to resist.
Try making a batch of these alongside your favorite cookie hot chocolate for a double dose of comfort on cold days. The duality of enjoying the drink while nibbling on its cookie counterpart makes for a delightful sensory experience.

Common Mistakes to Watch For
Even with a simple recipe like hot cocoa cookies, little errors can lead to disappointing results. I’ve learned these lessons through countless batches, and I’m sharing them to save you from cookie mishaps.
Mixing and Preparation Errors
Overmixing the dough is a classic rookie mistake that leads to tough, dense cookies instead of the soft, tender treats we’re aiming for. Once the dry ingredients are incorporated, put down that mixer! Just mix until no flour streaks remain visible.
Using cold ingredients can cause uneven mixing and a less cohesive dough. Take butter, eggs, and other refrigerated items out about 30 minutes before you start baking. Room temperature ingredients blend more smoothly and create a more uniform cookie texture.
Skipping the chill time might seem like a time-saver, but it’s actually sabotaging your hot cocoa cookie recipe. Chilling the dough allows the flavors to develop and prevents excessive spreading in the oven. I recommend at least 30 minutes in the refrigerator—your patience will be rewarded with perfectly shaped cookies.
Baking and Timing Issues
Overbaking is perhaps the most heartbreaking mistake. Hot cocoa cookies should maintain a slight softness in the center when removed from the oven. Remember, cookies continue to bake on the hot sheet even after you’ve taken them out. I pull mine when the edges are set but the centers still look slightly underdone.
Another frequent misstep is adding marshmallows too late in the process. For that perfect gooey, melty marshmallow center that mimics a cup of delicious hot cocoa, add them about halfway through the baking time. This gives them just enough time to soften and melt without completely disappearing.
These cookies should capture the essence of your favorite homemade hot chocolate in cookie form, so avoid rushing any part of the process. The perfect balance of chocolate flavor, proper texture, and those signature melty marshmallows requires attention to detail.
By avoiding these common pitfalls, you’ll create hot cocoa cookies that not only look impressive but taste exactly like your favorite winter beverage in a delightful, portable form.

Smart Tips for Perfect Results
Getting those hot cocoa cookies just right requires attention to a few key details. I’ve compiled my top techniques to ensure your cookies turn out deliciously perfect every time. These practical tips will help you avoid common pitfalls and achieve that ideal texture—crisp edges with a soft, fudgy center that perfectly captures the essence of homemade hot chocolate in cookie form.
Before Baking Preparation
Starting with room temperature ingredients makes a significant difference in your cookie texture. Cold butter won’t cream properly with sugar, resulting in dense cookies instead of that lovely, tender crumb we’re after. I always set my butter, eggs, and other refrigerated items on the counter about 30 minutes before I begin mixing.
After mixing your dough, patience becomes your secret weapon. Chilling the dough for at least 30 minutes before baking allows the flavors to meld together while solidifying the fats. This crucial step prevents excessive spreading and creates cookies with better structure and deeper flavor. For an even more intense hot cocoa flavor, you can chill the dough overnight.
Using parchment paper on your baking sheets serves multiple purposes:
- Prevents cookies from sticking
- Promotes even baking
- Makes removal easier and helps maintain perfect cookie shape
This simple addition means your hot chocolate cookies will slide right off the pan without breaking, keeping their perfect shape intact.
Baking and Finishing Touches
Proper spacing on the baking sheet can’t be overlooked. I leave about 2 inches between each ball of dough to accommodate spreading. Overcrowding leads to cookies that run into each other and bake unevenly. When working with a typical cookie hot chocolate recipe, I usually limit myself to 9–12 cookies per standard baking sheet.
Timing is everything when adding marshmallows to your hot cocoa cookies. For that perfect melty-but-not-completely-dissolved effect, add mini marshmallows immediately after taking the cookies out of the oven. The residual heat softens the marshmallows just enough to adhere to the cookie while maintaining their shape. This gives you that classic homemade hot cocoa look and taste.
The visual appeal of these cookies comes from their rich contrast of dark cocoa dough and white marshmallows. For an extra special touch, I sometimes:
- Sprinkle a few chocolate chips over the warm marshmallows
- Dust cooled cookies with cocoa powder or powdered sugar
These additions enhance the hot chocolate recipe inspiration and add beautiful finishing touches.
For the best cookie texture, watch your baking time carefully. Hot cocoa cookies should look slightly underdone in the center when you remove them from the oven. They’ll continue cooking from residual heat on the baking sheet for about 5 minutes after removal. This results in that perfect balance of crisp edges and soft centers that makes these treats so irresistible.
Let the cookies cool on the baking sheet for 5 minutes before transferring to a cooling rack. This cooling period allows them to set properly without breaking apart. While it’s tempting to bite into a warm cookie immediately, giving them this time to firm up ensures the perfect texture and makes them easier to handle.
Storage and Serving Suggestions
Proper storage of these delectable hot chocolate cookies ensures they maintain their freshness and flavor. I’ve found that storing them correctly makes all the difference in preserving their rich chocolate taste and soft texture.
To keep your cookies fresh, place them in an airtight container at room temperature. They’ll stay delicious for up to 5 days when stored properly. For the best results, layer the cookies with wax paper between each row. This simple step prevents them from sticking together and maintains their shape and texture.
Freezing Options for Later Enjoyment
Don’t worry if you can’t finish all your cookies within five days! These treats freeze exceptionally well. I recommend these freezing tips:
- Cool cookies completely before freezing to prevent condensation
- Place in freezer-safe containers or heavy-duty freezer bags
- Label with the date to track freshness
- Store for up to 3 months for optimal taste
When you’re ready to enjoy your frozen cookies, let them thaw at room temperature for about an hour before serving.
For the ultimate taste experience, serve these cookies slightly warm. Pop them in the microwave for just 10–15 seconds, and they’ll develop that fresh-from-the-oven quality with melty chocolate chips and a soft center.
For a truly indulgent treat, pair these cookies with a mug of homemade hot chocolate. The combination creates a double dose of chocolate goodness that’s perfect for cold winter evenings or anytime you need a special treat. The cookies can even be dunked into the hot chocolate, allowing them to soften slightly and absorb some of that rich cocoa flavor.
If you’re serving these at a gathering, I suggest arranging them on a platter with a small pitcher of hot cocoa on the side. Your guests will appreciate the thoughtful pairing and the chance to enjoy these cookies in their most delicious form.
Creating Variations
I’ve discovered that hot cocoa cookies can be customized in countless ways, letting you tailor them to different tastes and occasions. The basic recipe serves as an excellent foundation for experimentation, and I’ve had success with several delicious twists that elevate these treats from simple cookies to show-stopping desserts.
Delicious Additions and Substitutions
Adding chocolate chips to your hot cocoa cookies introduces pockets of melty goodness that complement the cocoa flavor perfectly. I recommend using mini chocolate chips for even distribution throughout the dough, or chopped chocolate chunks for more dramatic melty pockets. A half cup folded into the dough just before baking works wonderfully, creating a double chocolate effect that intensifies the hot chocolate cookies experience.
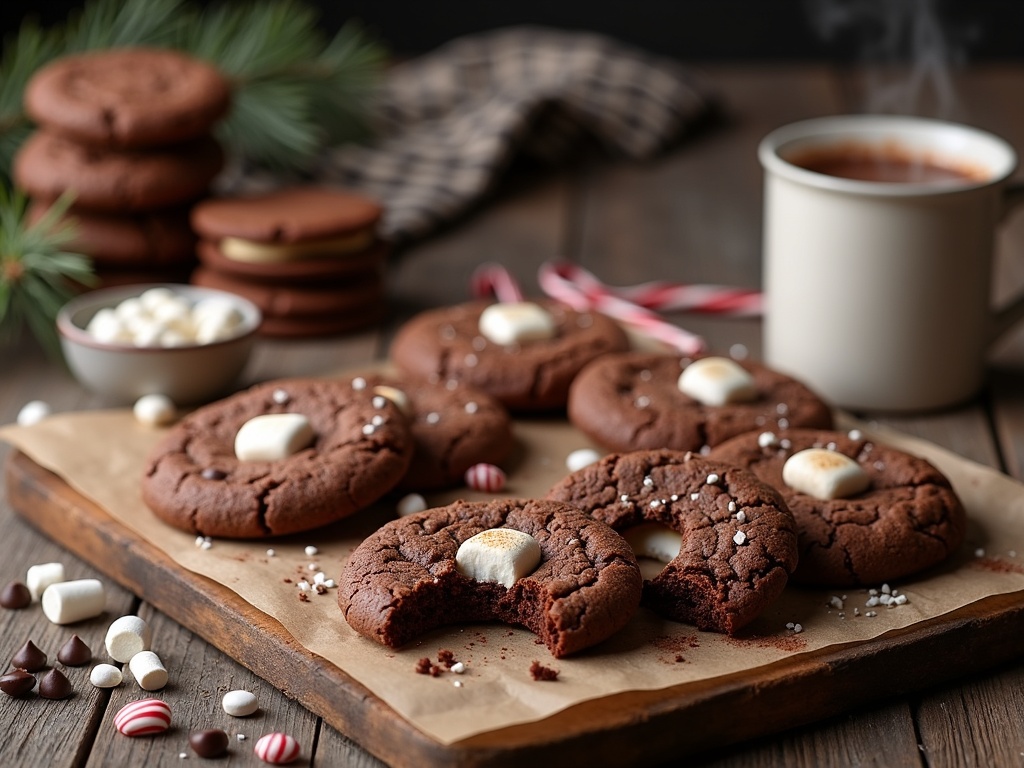
Marshmallows are signature ingredients in hot cocoa, and varying their size can dramatically change your cookies. While standard mini marshmallows work well, I’ve found that using micro marshmallows (the tiny ones from some hot cocoa recipe packets) create a more evenly distributed marshmallow flavor. For a showstopping presentation, try pressing a regular-sized marshmallow into the center of each cookie during the last two minutes of baking for that quintessential hot chocolate look.
Crushed peppermint adds a refreshing twist that’s especially welcome during holiday baking. I like to fold about 1/4 cup of crushed candy canes or peppermint candies into the dough and then sprinkle a bit more on top just after baking. The mint pairs beautifully with the chocolate and creates a festive red-and-white speckled appearance that’s perfect for Christmas cookie platters.
For those who enjoy lighter flavors, substituting white homemade hot chocolate mix for regular cocoa mix creates an entirely different cookie experience. These cookies turn out lighter in color with a sweet, creamy flavor that’s reminiscent of white hot chocolate. I sometimes add a few white chocolate chips to enhance this variation further.
One of my favorite transformations involves creating sandwich cookies with marshmallow cream filling. After baking and cooling your standard cookie hot chocolate batch, spread or pipe marshmallow cream between two cookies for a decadent treat that captures the essence of hot cocoa in every bite. For extra indulgence, I sometimes dip half the sandwich in melted chocolate and add sprinkles.
Beyond these variations, you can get creative with additional mix-ins:
- Cinnamon chips or a teaspoon of cinnamon powder for a Mexican hot chocolate inspired cookie
- Caramel bits or a caramel square pressed into the center while still warm
- Chopped nuts like walnuts or pecans for added texture and flavor
- Orange zest for a subtle citrus note that pairs wonderfully with chocolate
- A few tablespoons of instant coffee granules for a mocha variation
The beauty of homemade hot cocoa cookies is their flexibility. You can adjust the base recipe to accommodate nearly any flavor profile you enjoy in your favorite hot chocolate drink. I’ve found that keeping the core ingredients consistent while experimenting with one or two variations at a time yields the best results.
These variations transform a simple cookie into a versatile treat suitable for any season. While the classic recipe reminds me of cozy winter evenings, adding seasonal ingredients like peppermint during the holidays or citrus in the summer keeps these cookies relevant year-round. The possibilities are nearly endless, limited only by your imagination and hot chocolate recipe preferences.

