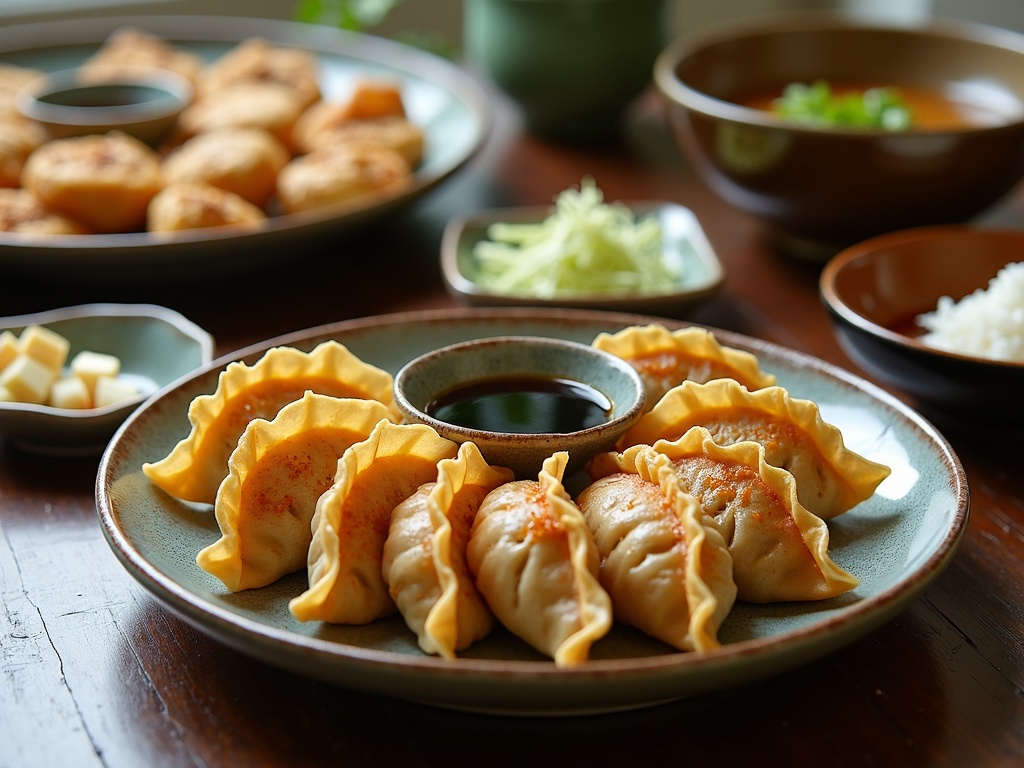
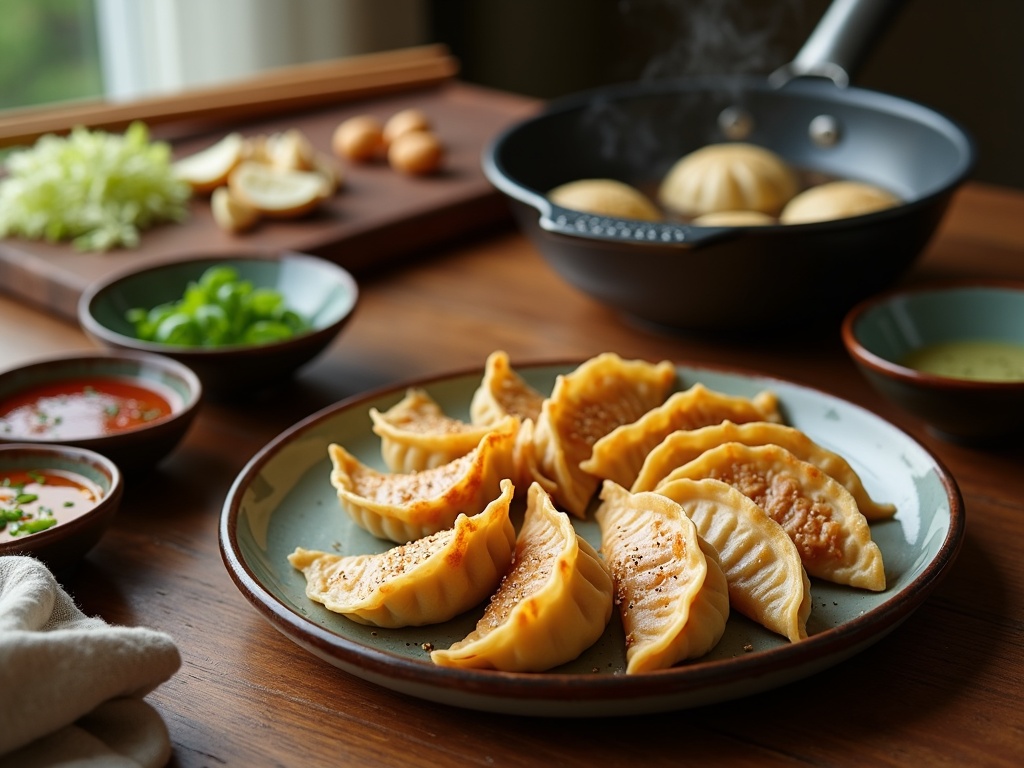
Gyoza: The Perfect Blend of Crispy and Tender
Gyoza recipe, a cherished Japanese dumpling derived from Chinese potstickers, delivers the ideal culinary harmony with its crispy bottoms and tender tops.
These adaptable dumplings appear in several forms including the popular pan-fried yaki-gyoza, boiled sui-gyoza, deep-fried age-gyoza, steamed mushi-gyoza, and shrimp-filled ebi-gyoza, each highlighting different textures and cooking methods.
Table of Contents
Key Takeaways
- Gyoza requires a balance of ingredients including ground meat, finely chopped Napa cabbage, green onions, ginger, garlic, and thin wrappers.
- The steam-fry cooking technique creates the signature crispy bottom and tender top that makes gyoza distinctive.
- Proper folding technique involves placing a small amount of filling off-center, creating 3-4 pleats on each side, and ensuring a strong seal.
- Common mistakes include overfilling wrappers, using wet filling, improper sealing, incorrect heat settings, and rushing the cooking process.
- Traditional dipping sauce follows a 2:1 ratio of soy sauce to rice vinegar, with optional additions like sesame oil, chili oil, garlic, or ginger.
What Makes Gyoza So Special
Gyoza holds a special place in Japanese cuisine, tracing back to Chinese potstickers (jiaozi) that were adapted by Japanese soldiers returning from China after World War II. Since then, these dumplings have become a staple in Japanese households and restaurants worldwide, cherished for their perfect balance of crispy bottoms and tender tops.
Popular Japanese Dumpling Variations
Japanese cuisine offers several delicious dumpling variations beyond the classic gyoza:
- Yaki-gyoza: The most common type with pan-fried bottoms and steamed tops, creating that signature crispy-yet-tender texture
- Sui-gyoza: Boiled dumplings with a softer, more delicate wrapper, often served in soups
- Age-gyoza: Deep-fried versions with a golden, crunchy exterior
- Mushi-gyoza: Steamed dumplings that highlight the filling’s flavors without added oil
- Ebi-gyoza: Specialty dumplings filled with shrimp instead of the traditional pork mixture
The versatility of these dumplings makes them perfect for any meal. I’ve found that they pair beautifully with other Asian dishes like authentic Pad Thai or can stand alone as an impressive appetizer before heartier fare such as homemade butter chicken.
Why Homemade Beats Store-Bought
There’s simply no comparison between fresh, homemade gyoza and the frozen alternatives. When you make gyoza yourself:
- You control the ingredients. Store-bought versions often contain preservatives and excess sodium, while homemade versions let you select quality meats and fresh vegetables.
- The texture is superior. The wrappers maintain the perfect consistency – thin enough to cook quickly but sturdy enough to hold the filling.
- The flavors are fresher and more vibrant. The aromatic combination of garlic, ginger, and cabbage shines through when freshly prepared.
- You can customize to your taste preferences. Whether you prefer spicier fillings like those found in traditional samosas or want to experiment with different proteins similar to Filipino adobo, homemade allows for endless creativity.
The cooking process creates that perfect crispy-bottom texture that frozen versions simply can’t replicate. The magic happens when the dumplings sear against the hot pan before the water creates steam to finish the cooking process.
While making gyoza from scratch requires some effort, the results are worth it. Much like creating authentic chicken biryani or flaky Greek spanakopita, the process connects you with culinary traditions that have been perfected over generations.
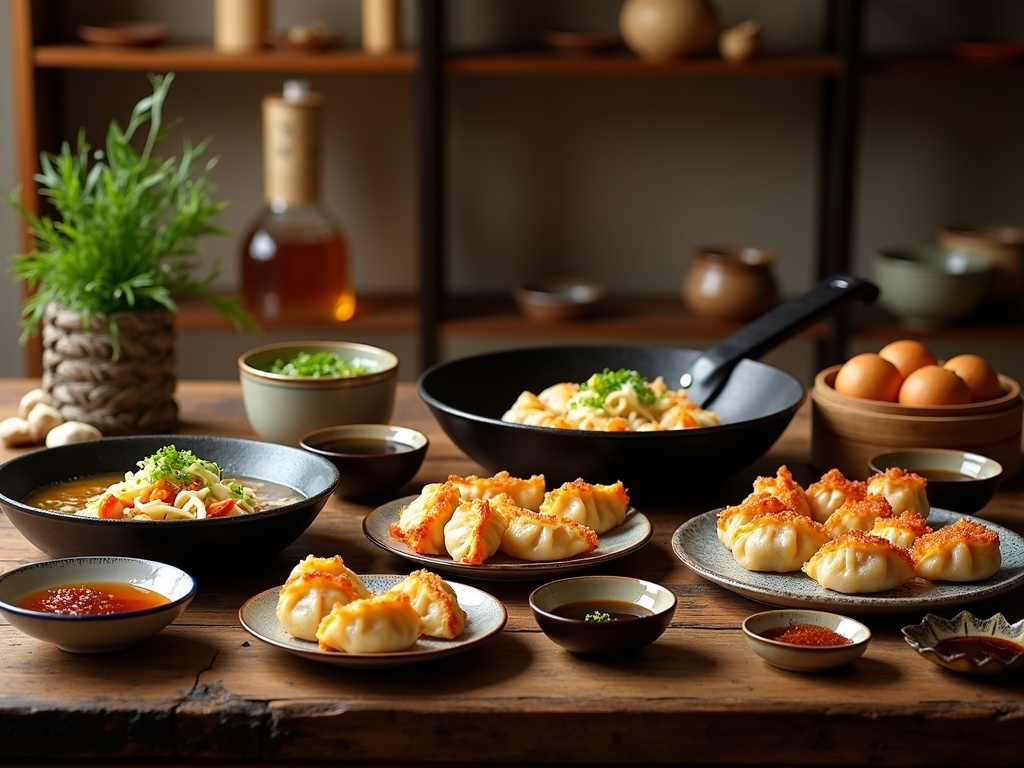
Everything You Need To Make Perfect Gyoza
Creating delicious gyoza at home is easier than you might think. I’ve perfected my recipe over the years, and now I’m going to share all the essential ingredients you’ll need to make these Japanese dumplings that will impress your friends and family.
Key Ingredients for Authentic Gyoza
The heart of any good gyoza recipe starts with quality filling ingredients. Ground pork forms the protein base of traditional gyoza, providing a juicy, flavorful foundation. Look for meat with a decent fat content (around 20%) to ensure your dumplings stay moist during cooking. If pork isn’t your thing, you can substitute with ground chicken or even create a vegetarian version.
Napa cabbage adds both moisture and a subtle sweetness to the filling. I always make sure to finely chop it and salt it lightly to draw out excess water before mixing it into the filling. This prevents soggy dumplings – nobody wants that disappointment after all your hard work!
Green onions (scallions) provide a mild onion flavor and bright color to your filling. I typically use both the white and green parts, finely minced to distribute the flavor evenly throughout each bite.
No gyoza is complete without the aromatic punch of fresh ginger and garlic. These two ingredients are non-negotiable for authentic flavor. I recommend grating both finely to release their oils and create a more intense taste experience that permeates the filling.
For the wrappers, you have options. Store-bought gyoza wrappers work perfectly and save time, but if you’re feeling ambitious, making your own from flour and water creates an extra special touch. The wrappers should be thin enough to cook quickly but sturdy enough to hold your filling without tearing.
Sesame oil is a game-changer in gyoza filling. Just a small amount adds a nutty, complex flavor that elevates the entire dumpling. Be careful not to overdo it though – a little goes a long way.
For seasoning, soy sauce provides the foundational savory element. I like to use a premium Japanese soy sauce for its cleaner, more complex flavor. Combined with a proper amount of salt and freshly ground black pepper, these simple seasonings allow the fresh ingredients to shine.
Helpful Extras
Beyond these basics, you might want to consider these additional items for serving and preparation:
- A small bowl of water for sealing wrappers
- Dipping sauce ingredients (soy sauce, rice vinegar, chili oil)
- A large non-stick pan with lid for the traditional fry-then-steam cooking method
- A dumpling press if you struggle with hand-folding
- Cooking oil for frying
When purchasing ingredients for gyoza, I find that freshness makes a significant difference, especially with the vegetables and aromatics. If you can visit an Asian market, you’ll often find more authentic wrapper options and possibly better prices on specialty ingredients.
Once you’ve assembled your ingredients, the real fun begins as you mix, fold, and cook your way to perfect homemade dumplings unlike takeout. The beauty of making gyoza at home is that you can adjust flavors to your preference and even experiment with different fillings once you master the basic technique.
For those who enjoy spicy food, consider adding a touch of white pepper or chili paste to your filling for heat. You might also try incorporating shiitake mushrooms for an umami boost or water chestnuts for textural contrast.
Now with all these ingredients ready, you’re set to create delicious dumplings from scratch that will have everyone asking for your gyoza recipe!
Preparing Your Workspace
Before diving into making gyoza, I need to set up my workspace properly. Having everything organized and within reach makes the assembly process much smoother, especially when working with delicate wrappers and fillings that can dry out quickly.
Essential Equipment Setup
My cutting board is the foundation of any good gyoza preparation station. I position it centrally on my countertop, making sure there’s enough room around it for all the other components. A sturdy wooden cutting board works best as it provides a solid surface for chopping ingredients and folding gyoza without sliding around. I make sure it’s clean and dry before starting.
Next to my cutting board, I place my mixing bowls in order of use. I typically need at least two bowls—a large one for combining the gyoza filling ingredients and a medium one for any pre-mixed seasonings. If I’m making a complex filling like those found in flavorful Asian-inspired recipes, I might have several small bowls with prepared ingredients ready to combine.
The small bowl of water is perhaps the most critical element that beginners often forget. This water acts as the “glue” that seals the gyoza wrappers together. I position this bowl within easy reach of my dominant hand, usually just above my cutting board. The water should be clean and at room temperature—no need for hot or cold water which might affect the wrapper texture.
Wrapper Management Techniques
Proper wrapper handling can make or break your gyoza-making experience. I always keep my gyoza wrappers covered with a clean kitchen towel while working. This prevents them from drying out, which happens remarkably quickly in most kitchen environments. The dry wrapper edges won’t seal properly, which can lead to filling leakage during cooking.
The kitchen towel I use is slightly damp—not wet—just enough to provide humidity without making the wrappers soggy. I lift one corner of the towel to remove one wrapper at a time, immediately covering the rest. This technique is particularly important when making larger batches similar to when preparing crispy fold-over dumplings from other cuisines.
For an assembly line approach, I arrange my workspace from left to right (reverse this if you’re left-handed):
- Covered stack of wrappers on the far left
- Small bowl of water next to the wrappers
- Cutting board in the center for filling and folding
- Prepared filling in a bowl just above the cutting board
- Lined tray on the right to place completed gyoza
This arrangement minimizes cross-contamination and creates a natural workflow. The finished gyoza should be placed on a tray lined with parchment paper or lightly dusted with flour to prevent sticking. If you’re not cooking immediately, keep the filled gyoza covered as well.
I leave enough clearance around my workspace for comfortable arm movement when pleating the gyoza edges. The folding technique can be similar to that used in other wrapped foods like delicate phyllo pastries, requiring precision and comfortable hand positioning.
By taking time to set up your workspace thoughtfully, you’ll find the gyoza-making process becomes more enjoyable and efficient, letting you focus on perfecting those beautiful pleats rather than scrambling for supplies.
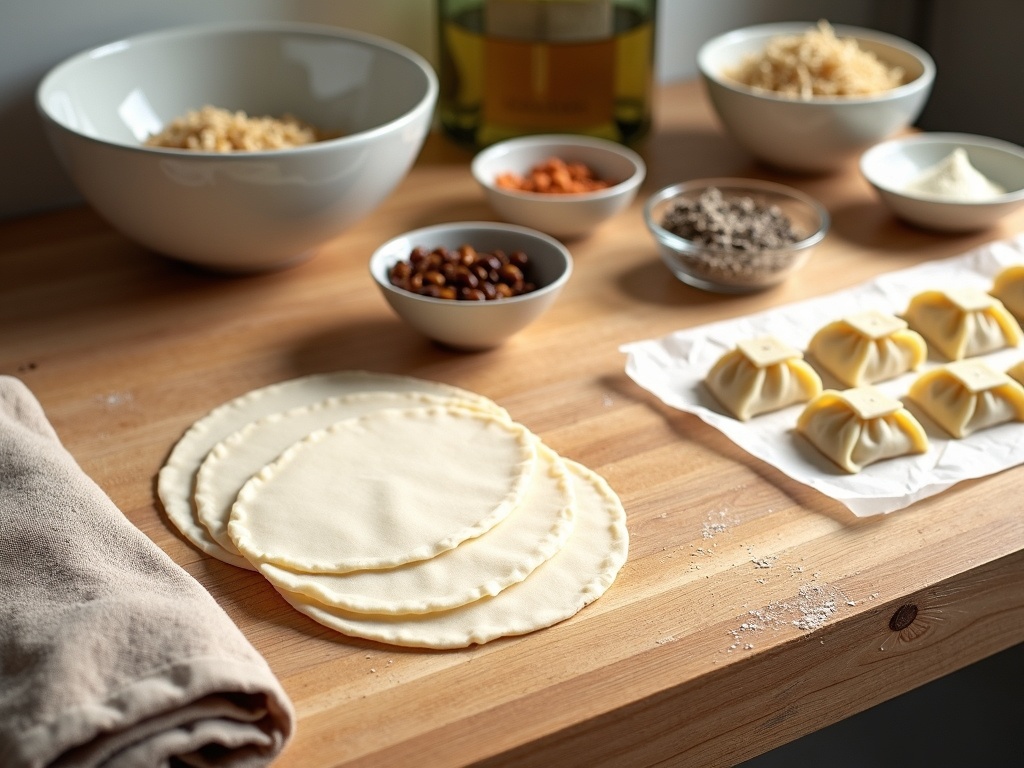
Folding Techniques That Work
Mastering the art of folding gyoza can transform your homemade dumplings from amateur to restaurant-quality. I’ve found that proper technique makes all the difference in both appearance and how well they cook.
The Perfect Fold
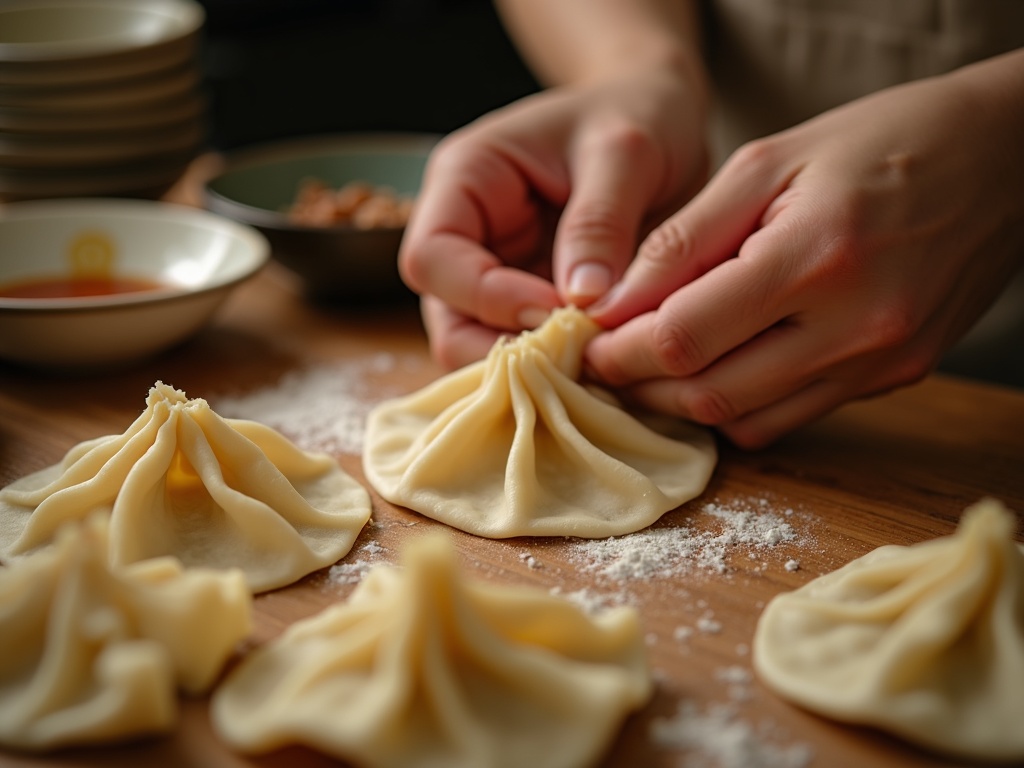
When holding the wrapper, place it flat on your palm or on a clean, dry surface. The key is to keep the center slightly thicker than the edges to prevent tearing. I like to moisten the edges with a small bowl of water and a finger—this creates the “glue” that will hold your dumpling together.
The proper filling amount is crucial—too much and your gyoza will burst during cooking; too little and you’ll end up with sad, deflated dumplings. I aim for about 1-1.5 teaspoons of filling for a standard-sized wrapper. The filling should be placed slightly off-center, allowing plenty of wrapper available for folding.
For the pleating method, follow these steps for consistent results:
- Fold the wrapper in half over the filling, pinching just the center point to create an initial seal
- Working from the center toward the right, create 3-4 small pleats by folding the front edge toward the center
- Repeat the pleating process on the left side
- Gently press along the sealed edge to remove any air pockets
Strong sealing is essential to prevent your gyoza from opening during cooking. I press firmly along the pleated edge, making sure there are no openings where filling might escape. For extra security, especially if you’re new to folding, brush a tiny amount of extra water along the sealed edge.
When first learning these techniques, don’t worry about creating picture-perfect dumplings. Even slightly irregular gyoza will taste delicious, and your skills will improve with practice. If you enjoy Asian-inspired recipes, you might also want to try making authentic Pad Thai or crispy samosas which use different but equally satisfying folding methods.
The finished gyoza should stand up with a flat bottom and a beautifully pleated top. This signature shape allows for the traditional cooking method where the bottom is pan-fried to crispness while the top remains tender after steaming. This same pleating technique can be modified for other Asian dumplings like savory filled buns with different fillings.
Cooking Your Gyoza Like A Pro
Pan-frying gyoza requires a careful balance of techniques to achieve that signature crispy bottom and tender top. I’ve mastered these methods through years of practice, and they’re simpler than they appear.
Mastering the Steam-Fry Technique
The secret to perfect gyoza lies in the steam-fry method, which combines direct heat with steam for ideal texture. Here’s my foolproof approach:
- Heat 1-2 tablespoons of neutral oil in a non-stick skillet over medium-high heat.
- Place gyoza flat-side down in a circular pattern, ensuring they’re not touching.
- Fry undisturbed for 2-3 minutes until the bottoms turn golden brown.
- Add ¼ cup water (enough to cover the pan bottom) and immediately cover with a tight-fitting lid.
- Reduce heat to medium and steam for 3-4 minutes.
This technique creates the perfect contrast between crispy bottoms and tender tops that makes gyoza so satisfying. When cooking multiple batches, I wipe the pan clean between each to prevent burnt oil from affecting the flavor of subsequent batches, similar to how I prepare crispy samosas with their distinctive texture.
Achieving the Perfect Crisp
The key to that beautiful golden-brown crust is patience and proper heat management. After the water has nearly evaporated and the wrappers look translucent, I remove the lid and increase the heat slightly. This final minute of cooking creates that signature crisp bottom that gyoza lovers crave.
You’ll know your gyoza are ready when the filling is hot throughout and the bottoms have a rich golden-brown color. The filling should reach at least 165°F (74°C) for food safety, particularly if you’re using a chicken filling similar to what you might use in a butter chicken recipe.
For an extra crispy finish, try the “gyoza skirt” technique: after the steam-fry process, mix 1 tablespoon of flour with 3 tablespoons of water and pour around the gyoza. Allow this to cook until it forms a crispy lattice connecting all the dumplings – this impressive presentation creates a crunchy network that elevates homemade gyoza to restaurant quality.
Don’t be discouraged if your first batch isn’t perfect. Like perfecting a classic Pad Thai, mastering gyoza cooking takes practice. The balance of initial frying time, steam quantity, and final crisping varies slightly with different stovetops and pan types. I recommend adjusting your technique based on results until you find your perfect method.
Common Gyoza Mistakes To Avoid
My years of making gyoza have taught me that this Japanese dumpling dish requires attention to detail. While making these delicious parcels is relatively simple, several common mistakes can turn your dumplings from delightful to disappointing. Let me guide you through the pitfalls to avoid for perfect gyoza every time.
Wrapper and Filling Errors
Overfilling the wrappers is perhaps the most frequent mistake I see beginners make. The temptation to stuff these little pockets with as much filling as possible is strong, but restraint is key. Using too much filling makes sealing difficult and often leads to bursting during cooking. I’ve found that one tablespoon of filling is generally the perfect amount for standard-sized wrappers.
Using wet filling can spell disaster for your gyoza. Excess moisture makes the wrappers soggy, difficult to seal, and prone to tearing. To avoid this:
- Thoroughly squeeze excess water from vegetables like cabbage before mixing
- Let cooked ingredients cool completely before combining with raw components
- If using tofu, press it properly to remove excess moisture
- Allow marinated meat to drain before adding to your filling mix
When I’m preparing ingredients for dishes like flavorful Asian noodles, I use similar moisture-controlling techniques to maintain texture integrity.
Improper sealing is another critical error that can ruin your gyoza experience. Poorly sealed edges will cause your dumplings to open during cooking, releasing the filling into your pan and resulting in a messy, unappetizing dish. For a proper seal:
- Apply water sparingly along the edge of the wrapper
- Press firmly to create a complete seal with no air pockets
- Never rush the pleating process
- Ensure the gyoza sits flat for proper cooking
After making countless batches, I’ve learned that taking time with this step is as important as when crafting perfectly sealed samosas – patience yields better results.
Cooking Technique Missteps
Using incorrect heat settings can quickly derail your gyoza cooking process. The classic preparation method involves both pan-frying and steaming, which requires careful temperature control. Starting with too low heat prevents proper browning, while too high heat risks burning the bottoms before the filling cooks through.
I follow this three-stage approach for perfectly cooked gyoza:
- Pan-fry with medium-high heat until the bottoms develop a golden crust (2-3 minutes)
- Add water and cover immediately to create steam (reduce to medium heat)
- Remove the lid after water evaporates and crisp up for another minute
This method creates that signature crispy bottom with tender tops that make gyoza so irresistible, similar to the textural contrast I aim for when making crispy spanakopita.
Improper arrangement in the cooking pan can also lead to uneven cooking. I always arrange my gyoza in a circular pattern with slight space between each piece. Overcrowding causes them to stick together and steam unevenly.
Rushing the cooking process is particularly problematic with gyoza. The filling needs adequate time to cook thoroughly, especially when using raw meat. Cutting cooking time short can result in undercooked filling that’s not only unpleasant but potentially unsafe.
The final common mistake is skipping the resting period after cooking. Allowing your gyoza to rest for 1-2 minutes after removing from heat lets the flavors settle and reduces the risk of burning your mouth. This small patience test makes a big difference in your enjoyment of the final product, just as it does when serving hot dishes like freshly made butter chicken.
By avoiding these common mistakes, you’ll be well on your way to creating restaurant-quality gyoza that impress with both appearance and flavor.
Must-Know Tips For Better Gyoza
Perfecting gyoza at home requires attention to some key techniques that can elevate your dumplings from good to exceptional. I’ve learned through trial and error that mastering a few fundamental aspects makes all the difference in creating restaurant-quality gyoza in your own kitchen.
Mastering Wrapper and Filling Techniques
Wrapper handling is perhaps the most critical skill to develop when making gyoza. The thin dough wrappers can be finicky if not handled correctly. Keep unused wrappers covered with a damp cloth while you work to prevent them from drying out. The edges of each wrapper should be slightly moistened with water using your fingertip before sealing, which helps create a proper seal without making the dough soggy.
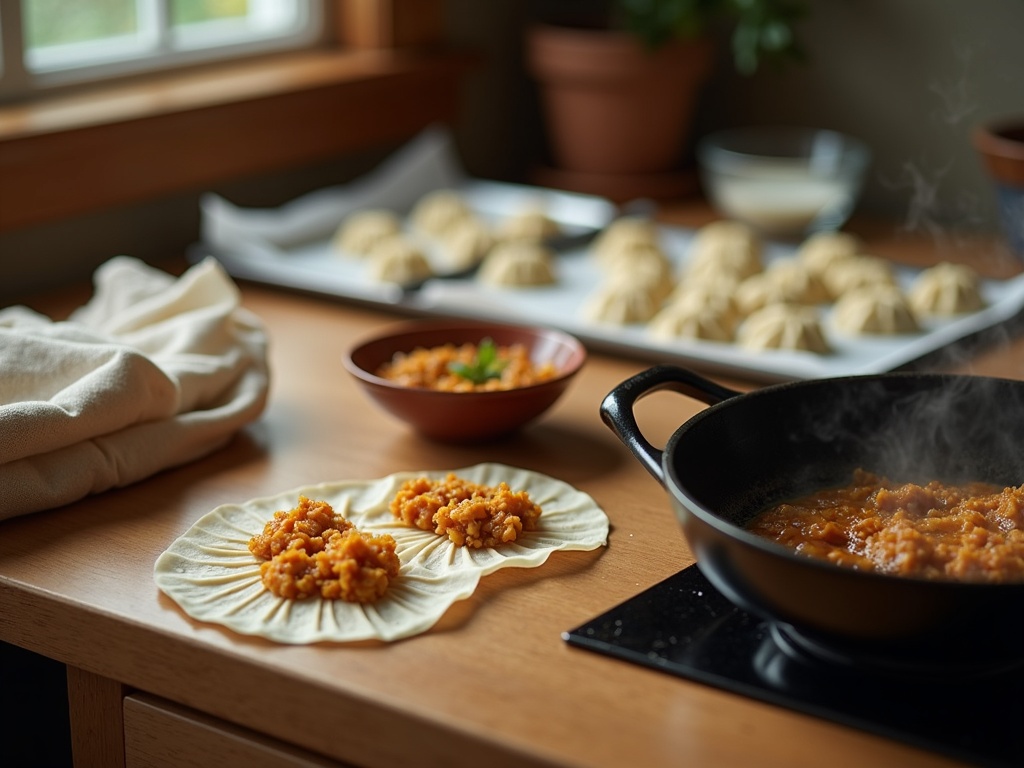
When it comes to filling consistency, balance is everything. Your mixture should be cohesive but not wet or runny, which can make the wrappers tear or become soggy. After combining your ingredients, let the filling rest for about 30 minutes in the refrigerator. This resting period allows the flavors to marry and excess moisture to be absorbed. If your filling seems too wet, try adding small amounts of cornstarch or breadcrumbs to absorb excess liquid.
The pleating technique for gyoza doesn’t just create their distinctive appearance – it serves a practical purpose by creating a flat bottom that helps them stand upright during cooking. Start with a small amount of filling (about 1–1½ teaspoons) in the center of each wrapper to avoid overfilling, which can cause ruptures during cooking. This technique pairs wonderfully with other Asian favorites like homemade Pad Thai for an impressive meal.
Perfect Cooking and Preparation Strategies
The famous gyoza cooking method combines both pan-frying and steaming, requiring careful attention to oil temperature. Start with a medium-high heat and a thin layer of oil. The ideal oil temperature should be hot enough that the gyoza sizzle when placed in the pan but not so hot that they burn before cooking through. Once the bottoms are golden brown (usually 2–3 minutes), add your water and cover immediately to create steam.
Making gyoza ahead and freezing them is a fantastic meal prep strategy. Place formed, uncooked gyoza on a baking sheet lined with parchment paper, ensuring they don’t touch. Freeze until solid (about 1–2 hours), then transfer to airtight containers or freezer bags. Frozen gyoza can be cooked directly from frozen – just add an extra minute or two to the steaming time.
For consistently shaped gyoza, try using a dumpling press if you’re making them frequently. However, hand-folding creates character and allows you to adjust the thickness of the edges. This attention to detail is similar to what makes dishes like authentic butter chicken so special – the personal touch makes all the difference.
When frying multiple batches, wipe out the pan between each to remove any burnt bits that might impart bitterness to subsequent batches. A non-stick pan works best for beginners, but a well-seasoned cast iron pan can provide superior heat distribution and browning.
For an extra crispy bottom, try the “gyoza skirt” technique: after the water has evaporated during steaming, drizzle a thin mixture of flour and water around the edges of the gyoza. This creates a delicate, crispy lattice connecting the dumplings when cooked – impressive when serving and delicious to eat.
If you enjoy making gyoza, you might also appreciate the technique-driven approach needed for crispy spanakopita, which shares similar folding and layering skills.
Dipping Sauce Magic
Creating the perfect dipping sauce for gyoza takes your dumpling experience to new heights. The sauce can make or break the dish, adding that essential tang and umami that complements the savory filling.
Crafting the Perfect Gyoza Sauce
The traditional gyoza dipping sauce follows a simple ratio that’s easy to remember: 2 parts soy sauce to 1 part rice vinegar. This classic combination delivers that signature tangy-savory balance that pairs perfectly with the rich flavors of gyoza. I often add a few drops of chili oil or sesame oil for added dimension.
Several ingredient options can transform your basic dipping sauce into something spectacular:
- Soy sauce: The foundation of most gyoza dips, providing saltiness and umami
- Rice vinegar: Adds brightness and acidity to cut through the richness
- Sesame oil: Just a few drops add nutty complexity
- Chili oil or flakes: For those who enjoy a spicy kick
- Minced garlic: Adds pungent flavor that complements the dumpling filling
- Grated ginger: Provides a fresh, zingy note
Don’t be afraid to customize your dipping sauce to suit your preferences. If you enjoy Thai-inspired flavors, try adding a splash of fish sauce and lime juice instead of rice vinegar. For a sweeter profile similar to what you might find with samosas, incorporate a touch of brown sugar or honey.
For an unexpected twist, I sometimes create a creamy gyoza sauce using a dollop of Greek yogurt, a splash of soy sauce, and fresh herbs. This pairs especially well with vegetable-filled gyoza and reminds me of sauces served with spanakopita.
If you make a larger batch of dipping sauce, proper storage is key. The sauce will keep in an airtight container in the refrigerator for up to one week. Just give it a good shake or stir before serving as some separation may occur. I don’t recommend freezing the sauce as it can alter the flavor profile and consistency.
For entertaining, I like to prepare three different dipping options – a traditional version, a spicy variant, and something unique like a citrus-ponzu style sauce. This variety allows guests to experiment with different flavor pairings, much like you might offer different chutneys with chicken biryani or various sauces with butter chicken.
The beauty of gyoza dipping sauce is its versatility – once you master the basic ratio, you can adapt it to complement virtually any filling or match your personal taste preferences.
Serving Suggestions
Gyoza make a fantastic addition to any meal, whether served as an appetizer, side dish, or main course. I’ve found that the right presentation and accompaniments can elevate these delicious dumplings to a whole new level. Let me share some of my favorite ways to serve gyoza that will impress your family and friends.
Traditional Accompaniments
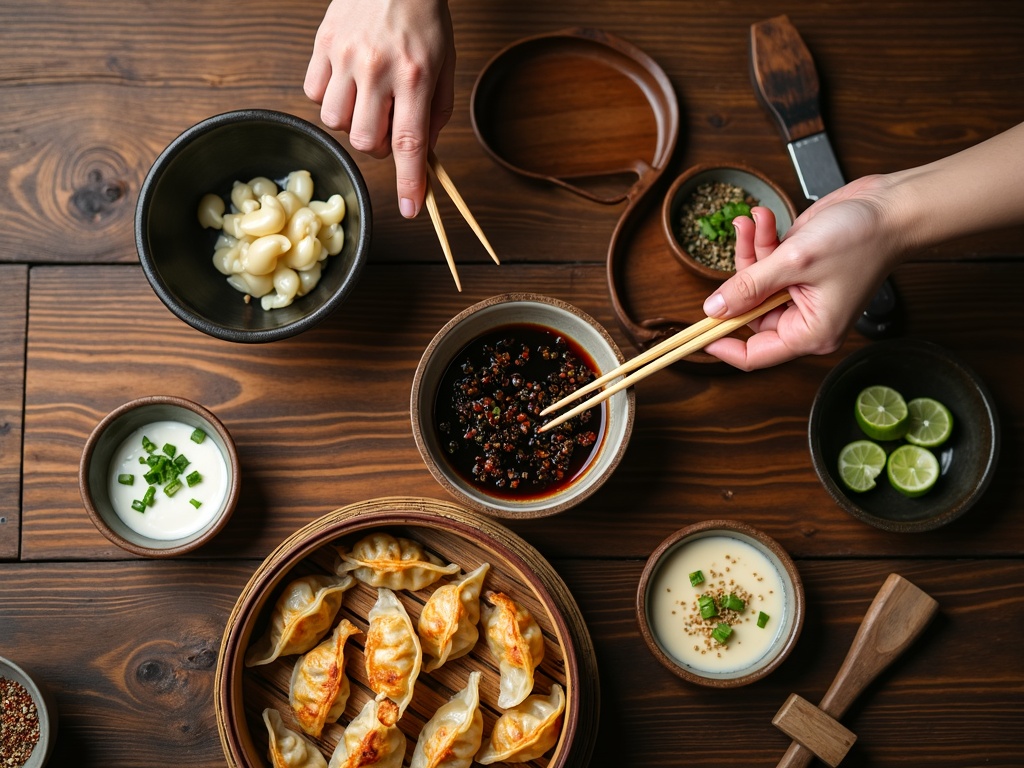
The classic gyoza experience isn’t complete without the perfect dipping sauce. Traditional Japanese gyoza sauce typically combines soy sauce, rice vinegar, and a few drops of chili oil or sesame oil. I like to add some minced garlic and ginger for an extra flavor kick.
Beyond the standard dipping sauce, consider these traditional accompaniments:
- Ponzu sauce: This citrus-infused soy sauce provides a tangy alternative
- Rayu (Japanese chili oil): Perfect for spice lovers who want to add heat
- Shredded cabbage: Serves as a refreshing palate cleanser between bites
- Pickled ginger: Adds a zingy contrast to the savory gyoza
For a complete Japanese dining experience, I recommend serving gyoza alongside a small bowl of miso soup and steamed rice. This combination creates a balanced meal that’s both satisfying and authentic. If you’re looking for other Asian dishes to complement your gyoza, Pad Thai makes an excellent pairing for a fusion-inspired feast.
Creative Meal Pairings and Presentation Ideas
While gyoza are traditionally served as part of a Japanese meal, they’re incredibly versatile and pair beautifully with dishes from various cuisines. Here are some creative meal pairing suggestions:
- For a simple weeknight dinner, serve gyoza with a side of stir-fried vegetables and steamed rice. The dumplings provide protein while the vegetables add color and nutrients.
- Gyoza also work wonderfully as part of a larger Asian-inspired spread. Consider serving them alongside flavorful butter chicken or aromatic chicken biryani for a fusion meal.
For presentation, I like to arrange gyoza in a fan or circle pattern on a plate, with the crispy bottoms facing up for visual appeal. A small dish of dipping sauce and garnishes like chopped green onions or sesame seeds add the finishing touch.
For casual gatherings, consider serving gyoza as part of an Asian appetizer platter alongside crispy samosas and other finger foods. This creates a diverse spread that guests can enjoy while mingling.
When hosting a larger party, I set up a DIY gyoza bar where guests can choose their dipping sauces and garnishes. I place gyoza on warming trays to keep them hot throughout the event. Small serving plates and cocktail napkins make it easy for guests to grab a few dumplings as they socialize.
Reheating gyoza is simple: the pan-fry method works best to restore their crispy texture. Add a few tablespoons of water to a hot frying pan with the gyoza, cover, and steam for 2–3 minutes. Remove the lid and allow any remaining water to evaporate, giving the bottoms a chance to crisp up again. For quick reheating, 30 seconds in the microwave works in a pinch, though the texture won’t be as good.
If you’re planning to make gyoza ahead for a party, you can partially cook them, refrigerate, and then finish them just before serving. This approach saves time while ensuring your guests enjoy fresh, hot dumplings. For a Mediterranean twist to your international spread, adding spanakopita creates a delightful contrast of flavors and textures.
