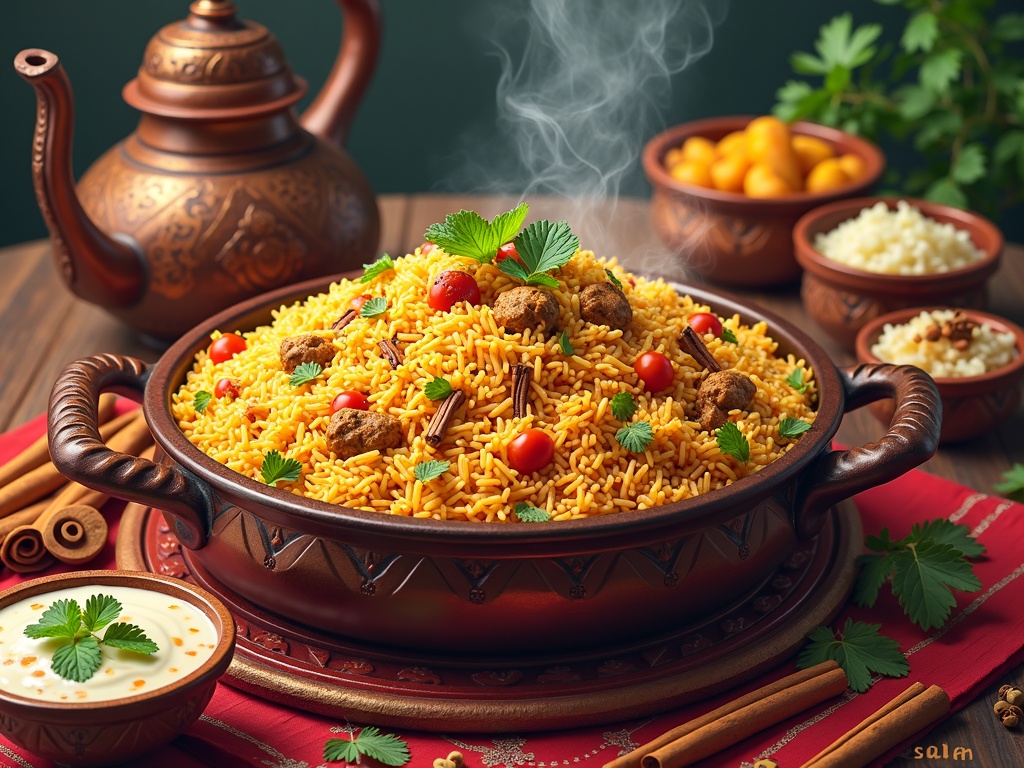
Dum biryani stands as a culinary masterpiece where slow-cooking in a sealed pot transforms simple ingredients into an aromatic, layered delicacy. This Mughal-era dish showcases the perfect harmony between fragrant basmati rice and tender meat, with its distinct preparation method allowing spices to infuse deeply into every grain through captured steam.
Find In This Article
Key Takeaways
- The “dum” technique involves sealing the cooking pot with dough to trap steam, allowing ingredients to cook in their own juices and develop complex flavors.
- Proper ingredient preparation is crucial – soaking rice, marinating meat, and preparing fresh spice blends create the foundation for authentic flavor.
- The layering process is methodical, with precise arrangements of rice, meat, herbs, and spices that create distinct yet harmonious flavor profiles.
- Temperature control is essential – starting with medium-high heat and reducing to low creates the perfect environment for flavors to develop during the 25-30 minute cooking time.
- Regional variations like Hyderabadi, Lucknowi, Kolkata, Malabar, and Sindhi biryani showcase how the dish has evolved while maintaining its core cooking technique.
What Makes Dum Biryani So Special
Dum biryani stands out as one of the most celebrated dishes in South Asian cuisine. I’ve found that its distinct preparation method creates flavors unlike any other rice dish. The term “dum” refers to the steam-cooking technique where the pot is sealed with dough, allowing the ingredients to cook in their own juices and aromatic steam.
A Rich Historical Legacy
Dum biryani’s origins can be traced back to the Mughal era in India. The royal kitchens of the Mughals perfected this cooking style, which eventually spread throughout the Indian subcontinent. What started as a royal dish gradually became accessible to common people, though the traditional cooking methods remained largely unchanged. The careful layering of partially cooked rice with marinated meat creates a perfect harmony of flavors that has stood the test of time.
The true magic happens during the slow cooking process. I seal the biryani pot with dough (called “dum”) and place it over low heat, allowing the ingredients to simmer gently. This technique locks in all the aromas and forces the spices to infuse deeply into every grain of rice and piece of meat. The result? A beautifully fragrant dish where each grain of rice stands separate yet is packed with flavor.
Regional Variations Worth Exploring
Different regions across India have put their own spin on dum biryani, each with distinct characteristics:
- Hyderabadi Biryani: Known for its strong spices and tender meat, often using goat or lamb
- Lucknowi Biryani: Features a more subtle flavor profile with delicate aromatics
- Kolkata Biryani: Includes potatoes and boiled eggs with lighter spices
- Malabar Biryani: Uses short-grain rice and features coastal spices and flavors
- Sindhi Biryani: Characterized by its tanginess and generous use of mint
These regional differences showcase how dum biryani has evolved while maintaining its core cooking technique. Each version tells a story of local ingredients and cultural preferences.
I’ve discovered that making authentic dum biryani at home is absolutely possible with the right techniques. The key lies in quality ingredients, proper layering, and patience during the slow cooking process. For a delicious homemade version, you might want to check out this chicken biryani recipe that follows traditional methods.

Essential Ingredients for Authentic Flavor
The secret to crafting a memorable dum biryani lies in selecting quality ingredients that work harmoniously to create those complex layers of flavor. I’ve found that paying attention to these key components makes all the difference between a good biryani and an exceptional one.
Foundation Elements
Basmati rice serves as the backbone of any authentic biryani. Look for aged, long-grain basmati with a distinct aroma – the aging process develops its characteristic fragrance and ensures the grains remain separate after cooking. I prefer rice that’s been aged for at least one year as it absorbs flavors better while maintaining its integrity during the long cooking process.
For the protein component, you have several excellent options. Chicken creates a lighter biryani that cooks relatively quickly and absorbs spices wonderfully. For a more traditional chicken biryani experience, bone-in pieces deliver superior flavor. Lamb offers a rich, distinctive taste that pairs beautifully with the aromatic spices, while goat meat provides an authentic flavor popular in many regional variations.
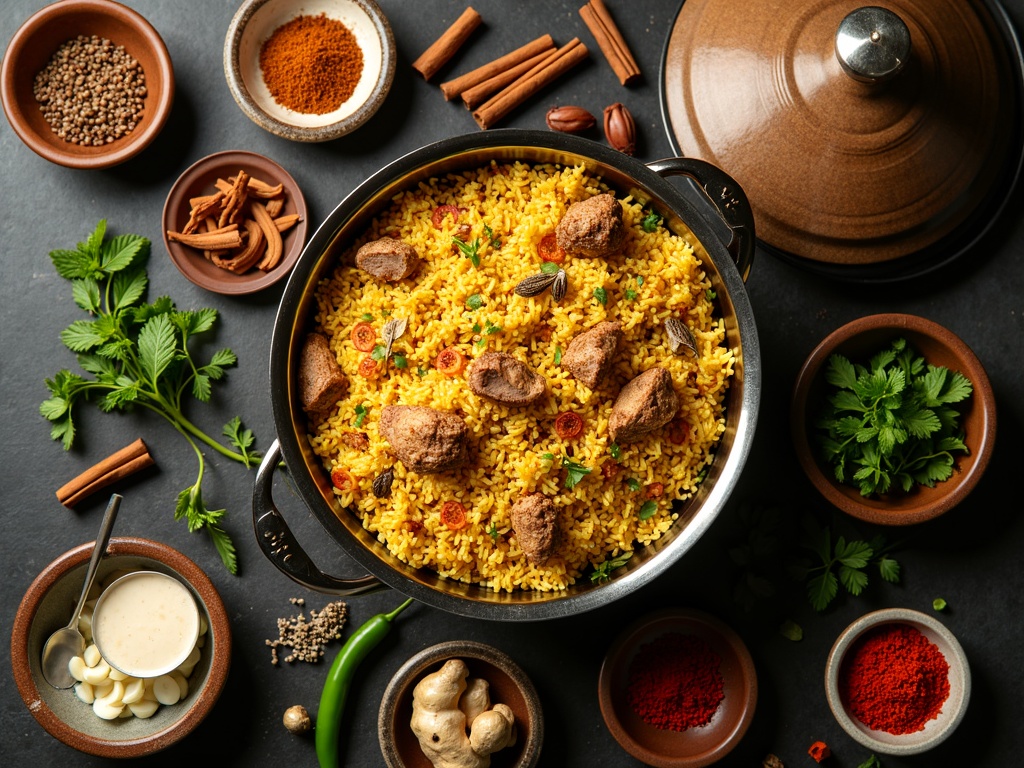
The whole spice mix forms the aromatic foundation of biryani. You’ll need:
- Cinnamon sticks (2-3 inches)
- Green cardamom pods (8-10)
- Black cardamom pods (2-3)
- Cloves (8-10)
- Bay leaves (2-3)
- Star anise (1-2)
- Mace blades (2-3)
- Black peppercorns (8-10)
- Cumin seeds (1 tablespoon)
Fresh herbs and aromatics bring brightness and depth. Mint leaves and cilantro add fresh notes that cut through the richness. Green chilies contribute heat without overwhelming the dish. For the base flavor, nothing beats the combination of thinly sliced onions (preferably fried until golden brown), ginger, and garlic pastes.
The crowning glory of a spectacular biryani is the saffron and milk mixture. To prepare this, soak a generous pinch of saffron strands in warm milk for 20-30 minutes before drizzling it over the partially cooked rice. This creates those beautiful yellow streaks and infuses the dish with saffron’s distinctive aroma. For best results, use full-fat milk and high-quality saffron threads – I’ve found that Spanish or Iranian varieties work exceptionally well.
Each ingredient plays a crucial role in building those iconic flavors that make dum biryani one of the most celebrated dishes in South Asian cuisine.
Preparing Your Ingredients
Preparing a perfect dum biryani starts with properly handling each component. I’ve found that taking time with ingredient preparation makes all the difference in creating those complex, layered flavors that make biryani so special.
Essential Preparation Steps
The meat marination is your flavor foundation. I combine chicken thighs with yogurt, ginger-garlic paste, red chili powder, turmeric, and garam masala, then let it rest for at least 2 hours, though overnight produces even better results. The yogurt tenderizes the meat while helping the spices penetrate deeply. If you’re looking for an excellent protein option, my chicken biryani recipe provides detailed guidance.
Rice preparation is equally critical. I soak basmati rice for 30 minutes to help the grains lengthen during cooking. After soaking, I par-boil it with whole spices like cardamom, cloves, and bay leaves until it’s 70% cooked—this prevents mushiness in the final dish while allowing the rice to finish cooking with the meat’s flavors.
For the spice blend, I toast whole spices before grinding them fresh. This mixture typically includes:
- Cardamom pods (green and black)
- Cinnamon sticks
- Cloves
- Star anise
- Cumin seeds
Caramelized onions add sweet depth that balances the spicy elements. I thinly slice onions and fry them slowly until they reach a deep golden-brown color. This process takes patience—about 15-20 minutes—but creates that signature sweet-savory flavor that’s essential to authentic biryani.
The saffron milk mixture adds color and aroma. I soak a pinch of saffron strands in warm milk for at least 20 minutes before assembly. This creates a golden-hued, fragrant liquid that will create beautiful color streaks through the rice during the final cooking stage.
Proper ingredient preparation isn’t just about following steps—it’s about building layers of flavor. Each component contributes to the final dish, creating that magical moment when you break through the dough seal and the aromatic steam carries the promise of a perfect biryani.
Layering Your Biryani
The magic of a perfect dum biryani lies in its methodical layering. I’ve found that mastering this technique transforms an ordinary rice dish into an extraordinary culinary masterpiece where every grain absorbs the complex flavors of spices and meat.
Building the Foundation
The bottom layer serves as the foundation for your entire biryani. I start with a thin layer of ghee or oil in my heavy-bottomed pot to prevent sticking. Next comes a thin layer of rice, which acts as insulation and stops the meat from burning during the slow cooking process. This initial rice layer should be about one-quarter of your total rice.
For the meat arrangement, I place the marinated meat (which has been partially cooked) evenly over this base rice layer. The trick is to avoid overcrowding – space the meat pieces so they continue cooking evenly in the steam. If you’re making chicken biryani, ensure the pieces are similar in size for consistent cooking.
The herb and spice distribution needs careful attention. I sprinkle half of my fried onions, mint leaves, coriander leaves, and green chilies directly onto the meat layer. This middle layer is where much of the flavor infusion happens, so be generous with these aromatics.
Next comes another layer of rice (about half of your remaining rice), followed by more herbs and spices. The final rice layer goes on top, creating a three-tiered structure. Each rice grain should be partially cooked and separate – not mushy or sticky.
The perfect seal is crucial for the dum (steam) cooking method. I spread a thin layer of saffron-infused milk over the top rice layer, which not only adds color but helps seal in moisture. Then I cover the pot with aluminum foil, pressing it tightly around the edges before placing the lid on top. This creates an airtight environment where the steam circulates, cooking everything to perfection.
For the steam holes technique, I use the handle of a wooden spoon to make 5-6 small holes through all layers of the biryani. These holes allow steam to travel upward, ensuring even cooking throughout the layers. Without these steam pathways, you might end up with undercooked sections in your biryani.
The Cooking Process
Heat management is critical to dum biryani success. I’ve found that starting with high heat and then reducing to low creates the perfect environment for the flavors to develop. Initially, I set my stove to medium-high when placing the sealed pot on the flame. After about 5 minutes, I lower it to the minimum setting for the remainder of the cooking time.
The timing varies slightly depending on your cooktop and pot thickness, but generally, 25-30 minutes on low heat yields perfectly cooked rice and tender meat. I always test by removing a grain of rice from the edge of the pot (where it’s least likely to disrupt the cooking process) and pressing it between my fingers. If it’s soft but still maintains its shape, the biryani is ready.
Steam Collection Techniques
The magic of dum biryani happens when steam is trapped inside the cooking vessel. I create an effective seal using one of these methods:
- Dough seal – I mix flour and water to create a rope of dough that’s placed along the rim of the pot before the lid goes on.
- Foil barrier – I cover the pot with aluminum foil, then place the lid on top for a tight seal.
- Heavy weight – I place a heavy object like a stone or another pot on top of the lid.
This sealed environment ensures the aromatic steam circulates throughout the biryani, infusing every grain of rice with fragrant spices. The resulting dish has incredible depth of flavor that simply can’t be achieved with regular cooking methods.
The resting period after cooking is non-negotiable. Once I turn off the heat, I leave the biryani untouched for at least 15-20 minutes. This allows the flavors to settle, excess moisture to be absorbed, and prevents the rice from becoming mushy when served. Think of it as similar to resting meat after cooking – patience delivers superior results.
When it’s finally time to open the sealed pot, I do so with care. First, I remove any weights and gently break the seal. As I lift the lid, I angle it away from me to avoid the rush of hot steam. The moment of revelation is always dramatic – vibrant colors, distinct layers, and an incredible aroma that fills the kitchen.
For an impressive presentation that showcases your culinary skills, try serving your biryani with a chicken biryani recipe that features beautiful layers of rice and meat when you scoop from the bottom of the pot.

Common Mistakes to Avoid
Making a perfect dum biryani requires attention to detail. I’ve seen many home cooks struggle with this dish despite following recipes to the letter. Let me walk you through the most common pitfalls that can turn your biryani from extraordinary to ordinary.
Balance and Technique Issues
Getting the rice-to-meat ratio wrong is perhaps the most frequent mistake I encounter. Too much rice makes the biryani dry and bland, while too much meat can make it overly heavy and greasy. I aim for a 2:1 ratio of rice to meat for the perfect balance. This ensures each spoonful contains the right combination of flavors and textures. For special occasions, you might consider trying a chicken biryani recipe which can be more forgiving for beginners.
Improper sealing technique can sabotage your dum process. The whole point of dum cooking is to trap steam and aromas inside the pot, allowing flavors to meld together. I create a tight seal using dough (called “atta”) around the edges of the lid. Alternatively, you can use aluminum foil followed by a heavy lid. Without proper sealing, the steam escapes, and you’ll end up with separate layers of rice and meat rather than a cohesive biryani.
Temperature control is crucial yet often mismanaged. Starting with too high heat can burn the bottom layer before the top is cooked. Conversely, too low heat won’t generate enough steam for proper cooking. I begin with medium-high heat for 5-7 minutes, then reduce to low for the remaining cooking time. This technique ensures even cooking throughout the pot.
Over-mixing the layers is a common error made by impatient cooks. The beauty of biryani lies in its distinct yet harmonious layers. When you mix too vigorously during assembly or serving, you destroy the delicate structure. I gently layer the components and use a flat spoon to serve, cutting straight down through all layers rather than stirring.
Timing Missteps
Skipping the resting period is perhaps the most tempting mistake. After all that cooking, it’s hard to wait! However, those 15-20 minutes of resting after turning off the heat are essential. This period allows the flavors to settle and excess moisture to be absorbed. I’ve found that biryani served immediately after cooking often has inconsistent texture and temperature. A properly rested biryani will have perfectly tender rice with distinct grains and meat that’s juicy and flavorful.
Many cooks also rush the preparation of the rice. Properly aged basmati rice needs soaking for at least 30 minutes before cooking. Skipping this step results in broken grains and inconsistent texture. I soak my rice then par-boil it to about 70% doneness before layering. This ensures it finishes cooking perfectly during the dum process.
The aromatics layer is another area where timing matters. Adding fried onions, mint, and cilantro too early can cause them to become soggy and lose their distinctive flavors. I add these delicate ingredients just before sealing the pot to preserve their character.
By avoiding these common mistakes, you’ll be well on your way to mastering the art of dum biryani. Remember that practice makes perfect, and even experienced cooks sometimes need a few attempts to get this complex dish just right.
Expert Tips for Perfect Results
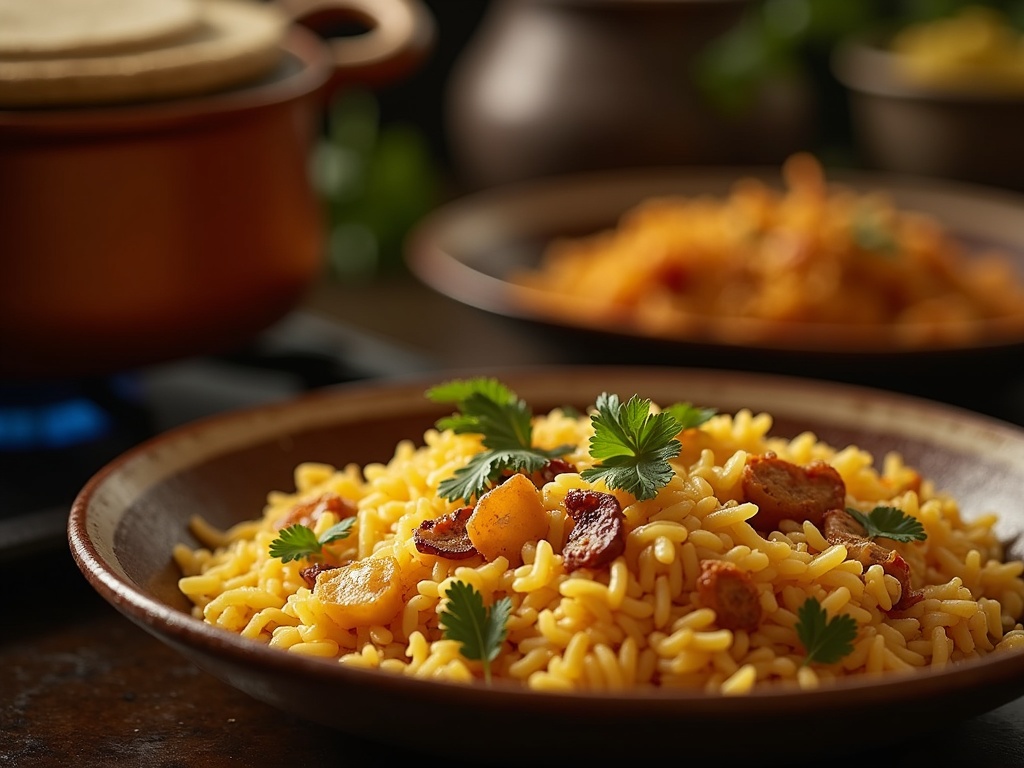
Creating a truly authentic dum biryani requires attention to specific techniques that can transform your dish from good to exceptional. I’ve gathered some practical tips that focus on the elements that matter most when preparing this fragrant rice dish.
Mastering the Rice
Achieving perfectly separated grains is perhaps the most crucial aspect of a memorable biryani. I soak basmati rice for 30 minutes before cooking, which allows each grain to absorb water evenly. This simple step prevents the rice from becoming mushy during the final dum process.
To maintain ideal texture, I never cook the rice fully during the parboiling stage – removing it when it’s about 70% done gives the perfect foundation. The rice continues cooking during the dum process, absorbing all those beautiful flavors while maintaining its integrity.
A trick I’ve found invaluable is adding a tablespoon of ghee and a squeeze of lemon juice to the parboiled rice. The fat coats each grain, preventing them from sticking together, while the acid helps maintain the rice structure.
For consistent results, I layer the rice using a perforated spoon rather than pouring it directly, which prevents compression and keeps those delicate grains intact. This methodical approach pays dividends in the final texture.
Balancing spices requires practice, but I’ve discovered that blooming whole spices in hot oil or ghee before adding other ingredients releases their essential oils, creating deeper flavor. A balanced biryani typically contains:
- Warm spices like cardamom, cinnamon, and cloves for aromatics
- Cumin and coriander for earthy notes
- Red chili for heat (adjustable to preference)
- Saffron and rose water for floral complexity
Moisture control can make or break your biryani. I place a tight-fitting lid sealed with dough (a traditional technique called dum) to trap steam within the pot. This creates a pressure cooking environment where flavors meld beautifully.
For home cooking, I place a heavy kitchen towel between the pot and lid to absorb excess condensation. This prevents water droplets from falling back onto the rice and making it soggy. The towel trick works wonders when you don’t have dough for sealing.
Controlling heat is essential during the dum process – I start with medium heat for 5 minutes, then reduce to the lowest setting for 20-25 minutes. This gentle cooking allows flavors to develop without burning the bottom layer.
When it comes to serving, presentation elevates the experience. I gently fluff the biryani with a fork rather than stirring, maintaining those beautiful layers when serving. Garnishing with fried onions, mint leaves, and a sprinkle of garam masala adds visual appeal and flavor contrast.
For complete enjoyment, I serve biryani with cooling raita, tangy pickle, and a fresh kachumber salad to balance the rich flavors. These accompaniments provide textural contrast and help cut through the richness of the dish. You might also enjoy pairing it with a chicken biryani recipe for special occasions.
Proper storage extends your biryani enjoyment. I cool leftovers completely before refrigerating in airtight containers, which maintains texture and prevents bacterial growth. Biryani actually develops deeper flavors overnight, making day-two biryani sometimes even more delicious!
When reheating, I sprinkle a tablespoon of water over the biryani and heat gently in a covered pan. This reintroduces moisture without making the rice soggy. Alternatively, using a microwave with a damp paper towel covering the dish works well for smaller portions.
These techniques might seem particular, but they’re the difference between ordinary rice with meat and an authentic, fragrant dum biryani that delights with every bite.
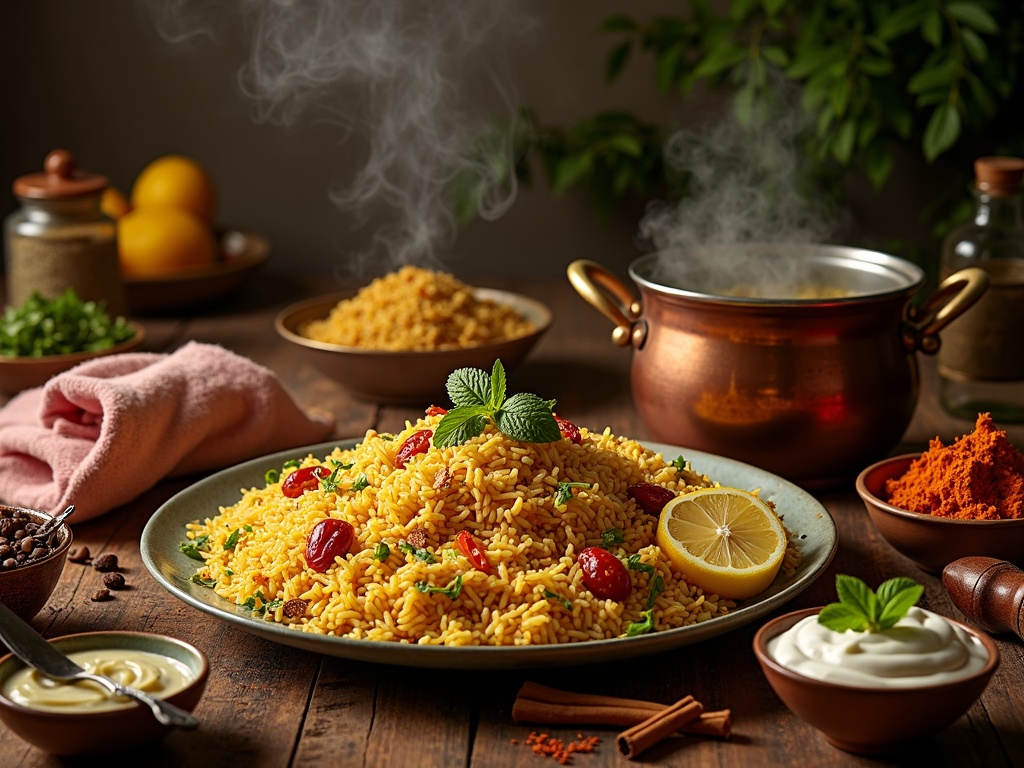
Perfect Accompaniments
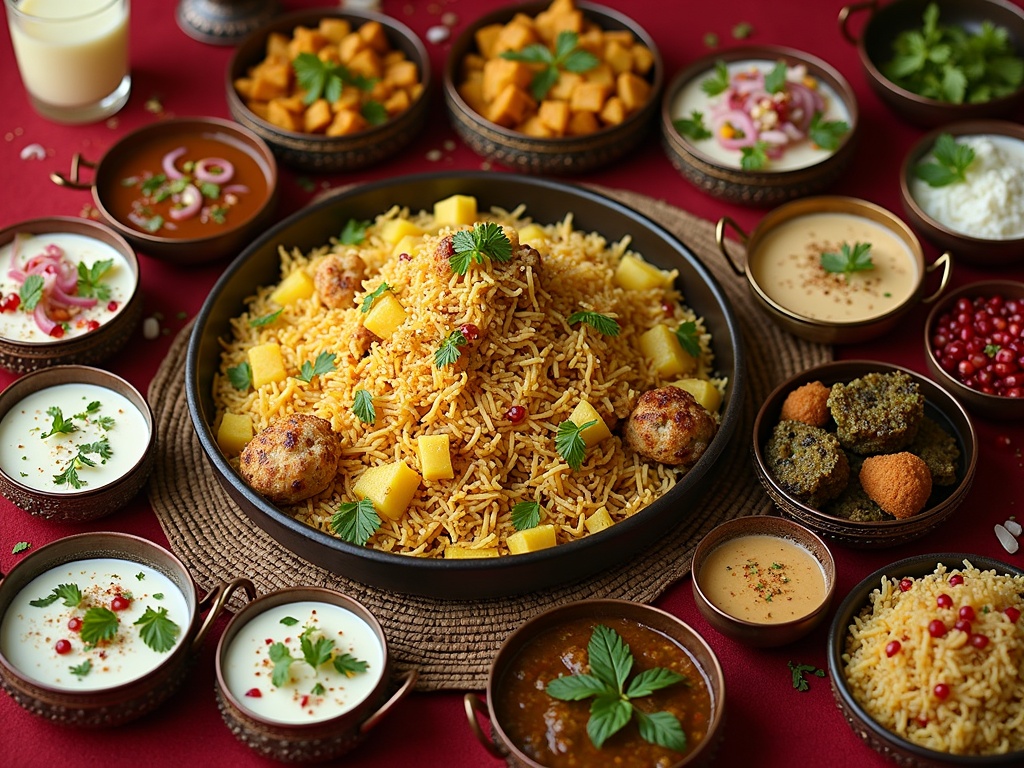
Finding the right side dishes can take your dum biryani experience to new heights. I’ve discovered through countless biryani feasts that the perfect accompaniments balance the rich, aromatic rice dish while complementing its complex flavors.
Cooling Raita Variations
Raita serves as the perfect cooling counterpart to the warm, spiced biryani. This yogurt-based side dish helps soothe the palate between bites of flavorful rice.
Traditional cucumber raita combines grated cucumber with whisked yogurt, a pinch of roasted cumin powder, and salt. For something more refreshing, try mint raita by adding finely chopped fresh mint leaves to the yogurt base. If you prefer something with more texture, boondi raita incorporates tiny fried gram flour balls into the yogurt mixture, creating a delightful crunch.
For a fruity twist, pineapple raita brings sweetness that cuts through the spice beautifully. Simply fold small pieces of fresh pineapple into the yogurt with a touch of black salt and roasted cumin powder.
My personal favorite is onion raita, made by mixing finely sliced red onions with yogurt, a dash of chaat masala, and fresh cilantro. It adds a sharp, crisp element that perfectly balances the richness of a chicken biryani recipe or any meat-based variation.
Flavorful Salan and Curry Accompaniments
Salan, a thin curry sauce, is a traditional biryani accompaniment that adds moisture and complements the dry, layered rice dish.
Mirchi ka salan, a Hyderabadi specialty, features green chilies cooked in a peanut, sesame seed, and coconut-based gravy. Its slightly tangy, nutty flavor profile works wonderfully with biryani’s aromatic spices.
Bagara baingan offers a delicious alternative with baby eggplants cooked in a similar gravy. The creamy texture of the eggplant contrasts nicely with the grain structure of the rice.
For something simpler, try shorba—a light, aromatic broth that can be spooned over biryani or enjoyed alongside it. Made with the same spices used in the biryani, it creates a harmonious flavor pairing.
Burhani raita, a garlicky yogurt preparation with fried garlic and chili flakes, offers both cooling properties and a punch of flavor that enhances the biryani experience.
When serving biryani at gatherings, I always prepare at least two accompaniments—typically a cooling raita and a salan—to give guests options that suit their preferences.
For garnishes, I recommend fresh elements that add color and brightness: thinly sliced lemon wedges, crispy fried onions, chopped cilantro, and mint leaves. A sprinkle of pomegranate seeds can add beautiful color and juicy bursts of sweetness to cut through the richness.
As for beverages, lassi makes an excellent pairing with its cooling yogurt base. The sweet version helps balance spicy biryani, while salted lassi aids digestion. For non-dairy options, try a refreshing mint-lime cooler or jeera (cumin) water, which supports digestion after a hearty meal.
Kahwa, a green tea preparation with cardamom, cinnamon, and saffron, offers a warming finish to the meal during cooler months. Its aromatic spice profile harmonizes with the biryani’s flavor profile while helping settle the stomach after a rich meal.
For special occasions, I serve sheer khurma (a vermicelli pudding) or kheer as a sweet ending to complete the feast. These milk-based desserts provide a soothing conclusion to the meal and reset the palate after the complex spice journey of a well-made dum biryani.
