Introduction
The total time you need to Boil Chicken Breast is 15-20 minutes, did you know that approximately 65% of home cooks struggle with determining the perfect timing when boiling chicken breast? Whether you’re meal prepping for the week or preparing ingredients for a delicious chicken and gravy recipe, knowing exactly how long to boil chicken breast can make or break your dish.
Table of Contents
Ingredients You Will Need
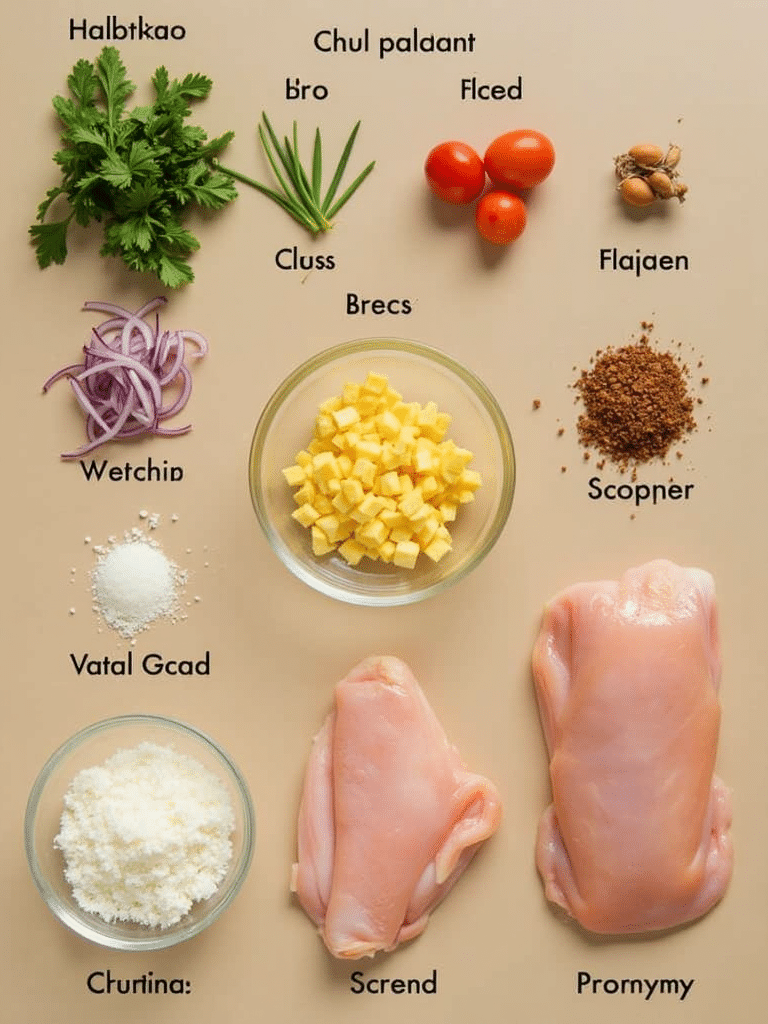
To perfectly boil chicken breasts, you’ll need:
- 2-4 boneless, skinless chicken breasts (approximately 8 oz each)
- 4 cups chicken broth or water (broth adds more flavor)
- 2 teaspoons salt (reduce if using broth)
- 1 teaspoon black pepper
- 2 bay leaves
- 2 cloves garlic, smashed (optional)
- 1 small onion, quartered (optional)
- 1 carrot, roughly chopped (optional)
- 1 stalk celery, roughly chopped (optional)
- Fresh herbs like thyme or parsley sprigs (optional)
For those looking to experiment with different flavors for your rotisserie-style chicken wraps, consider adding lemon slices, peppercorns, or specific spice blends like Italian seasoning or curry powder to your boiling liquid.
The aromatics infuse the chicken with a subtle yet pronounced depth that transforms plain chicken into something truly crave-worthy. The scent of garlic and herbs wafting through your kitchen as the chicken boils signals the delicious meal to come.
Timing
Understanding the precise timing for boiling chicken breast is crucial for perfect results. Here’s a breakdown:
- Preparation Time: 5 minutes
- Cooking Time: 10-15 minutes for boneless breasts (depending on size)
- Total Time: 15-20 minutes
Interestingly, most home cooks overestimate the necessary boiling time by nearly 40%, which is the primary cause of dry, rubbery chicken. The actual cooking time is significantly shorter than many expect, especially when compared to other cooking methods like roasting a whole chicken for slow cooker chicken recipes, which can take up to 4-6 hours.
Step-by-Step Instructions
Step 1: Prepare Your Chicken
Rinse the chicken breasts under cold water and pat them dry with paper towels. Check for any excess fat or unwanted parts and trim them off. For even cooking, ensure your chicken breasts are similar in size and thickness. If they vary significantly, you may want to pound the thicker pieces gently to create a more uniform thickness.
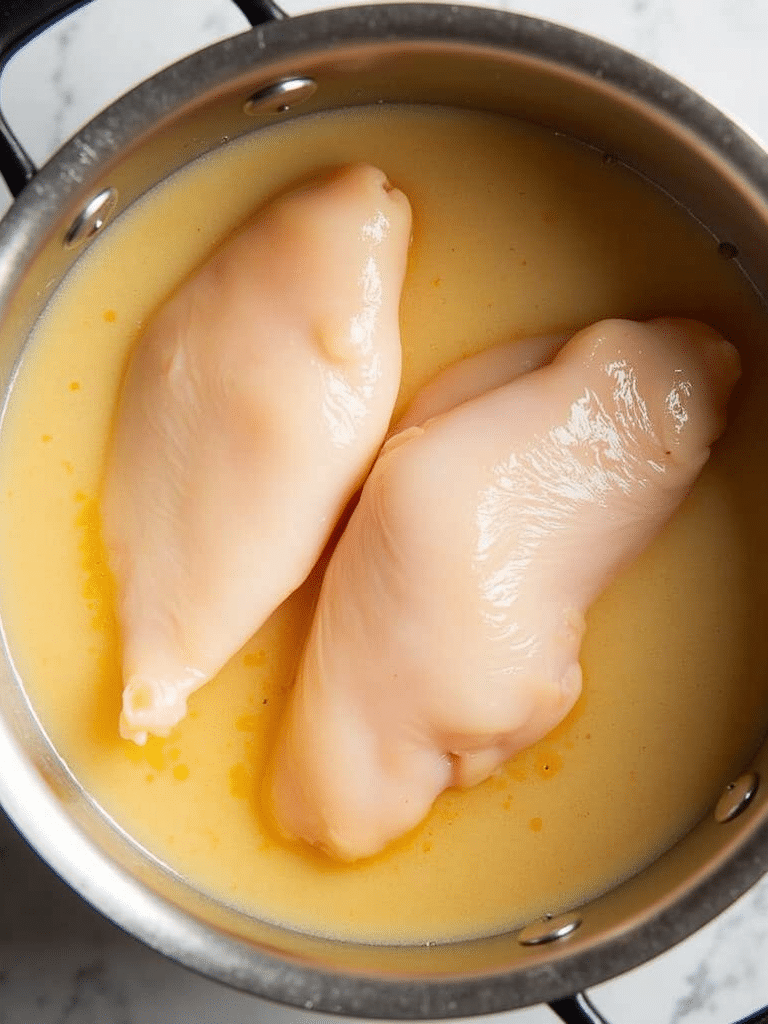
Step 2: Prepare Your Cooking Liquid
In a large pot, combine your broth or water with salt, pepper, and any aromatics you’re using. The liquid should be enough to fully submerge your chicken breasts by at least an inch. This ensures even cooking and maximum flavor infusion, similar to how you’d prepare a base for CAVA-style chicken.
Step 3: Bring to a Boil
Place the pot over medium-high heat and bring the liquid to a full rolling boil. This usually takes 5-7 minutes, depending on your stove and the amount of liquid. Avoid the temptation to rush this step by using high heat, as a gradual rise in temperature helps develop flavor.
Step 4: Add the Chicken
Once the liquid is boiling, carefully lower the chicken breasts into the pot. The liquid may temporarily stop boiling – that’s completely normal. Return the heat to medium-high until the liquid begins to boil again, then immediately reduce to a simmer.
Step 5: Simmer the Chicken
This is where precise timing becomes crucial for determining how long to boil chicken breast. Once the liquid returns to a gentle simmer (small bubbles breaking the surface), set your timer:
- For small chicken breasts (6-8 oz): 8-10 minutes
- For medium chicken breasts (8-10 oz): 10-12 minutes
- For large chicken breasts (10-12 oz): 12-15 minutes
Maintain a gentle simmer throughout cooking. A rolling boil can make the chicken tough, while too low heat will extend cooking time unnecessarily.
Step 6: Check for Doneness
After the minimum cooking time for your chicken breast size, check for doneness. The most accurate method is using an instant-read thermometer inserted into the thickest part of the breast – it should read 165°F (74°C). If you don’t have a thermometer, cut into the thickest part – the meat should be opaque white with no pink, and juices should run clear.
Step 7: Rest and Use
Once done, use tongs to remove the chicken from the liquid and place it on a cutting board. Let it rest for 5 minutes before slicing or shredding. This rest period allows the juices to redistribute throughout the meat, ensuring maximal tenderness and flavor – a tip I also recommend when making homemade chicken nuggets.
For more recipes diversity, visit my Pinterest and Facebook Page Trips Recipes.
Nutritional Information
Boiled chicken breast is a nutritional powerhouse, especially for those focused on clean eating. Here’s what you can expect per 4 oz (113g) serving:
- Calories: 120-140
- Protein: 26g (52% of daily value)
- Fat: 3g (5% of daily value)
- Saturated Fat: 1g
- Cholesterol: 75mg (25% of daily value)
- Sodium: 70mg (varies based on seasoning)
- Carbohydrates: 0g
- Fiber: 0g
- Sugar: 0g
Boiled chicken breast provides approximately 30% more bioavailable protein compared to other cooking methods like frying, making it an excellent choice for fitness enthusiasts and anyone following a high-protein diet.
Healthier Alternatives for the Recipe
While boiling chicken breast is already a healthier cooking method, you can further enhance its nutritional profile:
- Use bone broth instead of regular broth for additional collagen and nutrients
- Add turmeric to the boiling liquid (about 1 teaspoon) for anti-inflammatory benefits
- Include apple cider vinegar (1 tablespoon) in the liquid to help break down proteins and improve digestibility
- Try poaching instead of boiling (keep liquid at 160-180°F) for even tenderer results
- Use coconut aminos instead of salt for a lower-sodium flavor enhancer
- Add nutritional powerhouses like ginger, garlic, and lemongrass for both flavor and health benefits
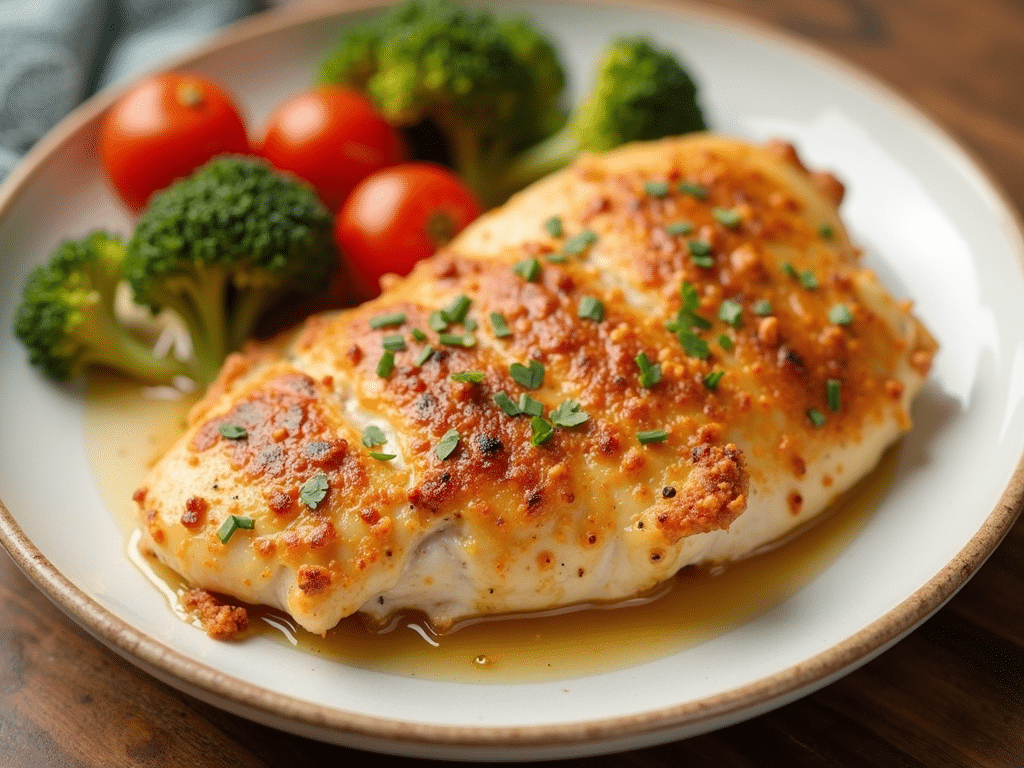
Serving Suggestions
Perfectly boiled chicken breast is incredibly versatile and can be used in countless recipes:
- Slice it for hearty salads or grain bowls
- Shred it for tacos, enchiladas, or chicken and yellow rice
- Cube it for quick pasta dishes or soups
- Use it in sandwiches or wraps with fresh vegetables
- Add it to stir-fries for a pre-cooked protein boost
- Incorporate it into casseroles for family meals
- Toss with buffalo sauce for a healthier take on buffalo chicken
- Mix with pesto and vegetables for an easy meal prep option
Common Mistakes to Avoid
When determining how long to boil chicken breast, watch out for these frequent pitfalls:
- Boiling too vigorously – a gentle simmer is key to tender results
- Overcooking – set a timer and check early rather than late
- Using breasts of different sizes without adjusting cooking times individually
- Skipping the rest period after cooking
- Not seasoning the cooking liquid adequately
- Discarding the flavorful cooking liquid (save it for soups or cooking grains!)
- Boiling frozen chicken breasts directly (thaw first for even cooking)
- Overcrowding the pot (chicken needs space to cook evenly)
- Removing chicken too soon (undercooked chicken poses health risks)
- Not adjusting for altitude (water boils at lower temperatures at high elevations)
Storing Tips for the Recipe
Properly storing boiled chicken breast extends its usability and prevents waste:
- Refrigeration: Store in an airtight container for 3-4 days
- Freezing: Wrap individual portions tightly in plastic wrap, then aluminum foil, and freeze for up to 3 months
- Cool completely before refrigerating or freezing
- Store chicken in its cooking liquid when possible to maintain moisture
- Label frozen packages with the date and contents
- Thaw frozen chicken breast in the refrigerator overnight for best results
- For meal prep: portion into serving sizes before storing
- Consider vacuum sealing for extended freezer life (up to 6 months)
- Use glass containers to prevent absorption of flavors from plastic
- Keep refrigerated at or below 40°F (4°C)
Conclusion
Mastering how long to boil chicken breast is a fundamental cooking skill that pays dividends in your culinary journey. While the process may seem simple, the precision in timing makes all the difference between dry, stringy chicken and succulent, tender meat that’s perfectly cooked. By following this guide, you’ll consistently achieve professional-quality results that serve as a versatile base for countless meals.
Remember that practice makes perfect, and you might need to adjust times slightly based on your specific equipment and preferences. I’d love to hear about your experience with this method – try it this week and leave a comment about how your chicken turned out! For more chicken inspiration, be sure to explore my other protein-packed recipes that utilize this versatile, lean meat.
Print
How Long to Boil Chicken Breast for Perfect Results
- Total Time: PT20M
- Yield: 4 servings
- Diet: Low Fat
Description
Perfect boiled chicken breast recipe with precise timing guidelines.
Ingredients
-
- 2–4 boneless, skinless chicken breasts (approximately 8 oz each)
-
- 4 cups chicken broth or water (broth adds more flavor)
-
- 2 teaspoons salt (reduce if using broth)
-
- 1 teaspoon black pepper
-
- 2 bay leaves
-
- 2 cloves garlic, smashed (optional)
-
- 1 small onion, quartered (optional)
-
- 1 carrot, roughly chopped (optional)
-
- 1 stalk celery, roughly chopped (optional)
-
- Fresh herbs like thyme or parsley sprigs (optional)
Instructions
Prepare Your Chicken
Rinse the chicken breasts under cold water and pat them dry with paper towels. Check for any excess fat or unwanted parts and trim them off. For even cooking, ensure your chicken breasts are similar in size and thickness. If they vary significantly, you may want to pound the thicker pieces gently to create a more uniform thickness.
Prepare Your Cooking Liquid
In a large pot, combine your broth or water with salt, pepper, and any aromatics you’re using. The liquid should be enough to fully submerge your chicken breasts by at least an inch. This ensures even cooking and maximum flavor infusion, similar to how you’d prepare a base for CAVA-style chicken.
Bring to a Boil
Place the pot over medium-high heat and bring the liquid to a full rolling boil. This usually takes 5-7 minutes, depending on your stove and the amount of liquid. Avoid the temptation to rush this step by using high heat, as a gradual rise in temperature helps develop flavor.
Add the Chicken
Once the liquid is boiling, carefully lower the chicken breasts into the pot. The liquid may temporarily stop boiling – that’s completely normal. Return the heat to medium-high until the liquid begins to boil again, then immediately reduce to a simmer.
Simmer the Chicken
This is where precise timing becomes crucial for determining how long to boil chicken breast. Once the liquid returns to a gentle simmer (small bubbles breaking the surface), set your timer:
-
- For small chicken breasts (6-8 oz): 8-10 minutes
-
- For medium chicken breasts (8-10 oz): 10-12 minutes
-
- For large chicken breasts (10-12 oz): 12-15 minutes
Maintain a gentle simmer throughout cooking. A rolling boil can make the chicken tough, while too low heat will extend cooking time unnecessarily.
Check for Doneness
After the minimum cooking time for your chicken breast size, check for doneness. The most accurate method is using an instant-read thermometer inserted into the thickest part of the breast – it should read 165°F (74°C). If you don’t have a thermometer, cut into the thickest part – the meat should be opaque white with no pink, and juices should run clear.
Rest and Use
Once done, use tongs to remove the chicken from the liquid and place it on a cutting board. Let it rest for 5 minutes before slicing or shredding. This rest period allows the juices to redistribute throughout the meat, ensuring maximal ten
Notes
Master the art of boiling chicken breast for tender, juicy results.
- Prep Time: PT5M
- Cook Time: PT15M
- Category: Main Dish
- Method: Boiling
- Cuisine: American